Step 3. Display Details for a Selected Department
WAM075 - Using a Tree View Weblet
In this step you will add a WebRoutine to display details for the selected department. Details will be displayed on the right hand side of the web page, inside a Navigation panel. The Navigation panel weblet enables output to be sent to this area of the page (in HTML terms the Navigation panel is an iFrame), without refreshing the whole page.
1. Create a WebRoutine DepDet to display department details.
Your code should look like the following
WebRoutine Name(DepDet)
Web_Map For(*input) Fields(#onsubid)
Web_Map For(*output) Fields((#deptment *out) (#deptdesc *out))
#deptment := #onsubid
Fetch Fields(*all) From_File(deptab) With_Key(#deptment)
Endroutine
2. Compile your WAM.
3. Open the DeptView WebRoutine in the view. In this step you will add a table with 1 row and 2 columns to the web page, and move the tree view into its left column.
a. Position your cursor to the right of the Tree View and press enter to insert a blank line below it.
Hint: Select the tree view, move the cursor right using the cursor key and press enter
b. Use the context menu to with 1 row and two columns, below the tree view.
c. Select the tree view and use the context menu to it.
d. Position the cursor in the left hand column of the table and use the context menu to the tree view into it.
e. Save your changes. Your web page should now look like the following:
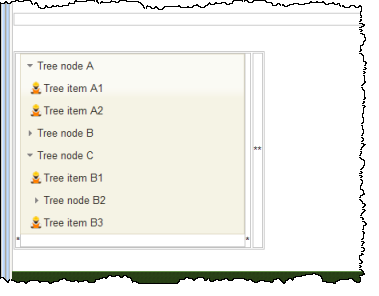
4. In this step you will add a Navigation panel weblet into the right hand cell of the table and set up the tree view to output details for a selected entry to this nav panel.
a. Drop a Navigation panel weblet into the right hand cell of the table.
b. Select the Navigation panel. Use the tab to change its name to dtl_panel.
Note: You are changing the property below the heading:
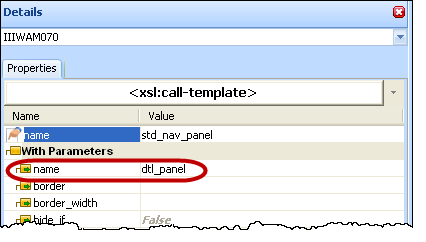
c. Change the Navigation panel to Yes.
d. Change the Navigation panel property to none.
e. Select the tree view. Using the tab, change its property to dtl_panel.
f. Change the tree view's property to Select. This will select an entry to display details when the entry's text is clicked.
g. Remove the place holder characters from the table cells.
h. With the cursor positioned in the left hand table cell, change its property to top. This will position the tree view at the top of the table cell.
i. With the cursor positioned in the right hand table cell, change its property to top.
j. Save your changes.
5. In this step you will set up the web page for WebRoutine DepDet, by giving it a blank layout. This WebRoutine will be displayed within the Navigation panel on the DeptView web page and therefore does not require a layout.
a. Open the DepDet WebRoutine in the view.
b. On the tab, select Layout Weblets in the top combo box:
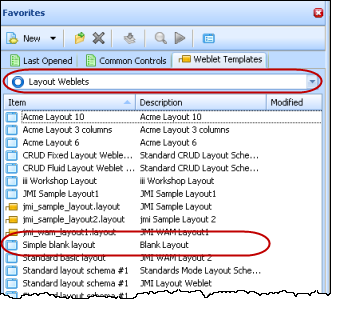
c. Drag and drop the Simple blank layout onto the web page.
d. From the ribbon select External Resources button. In the dialog, add the Style external resources which are required by your chosen common standard layout.
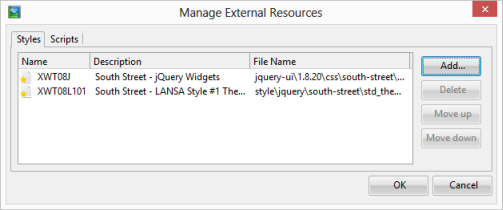
This will add these style sheets into the XSL for this WebRoutines web page and ensure that its contents are consistent with your common layout theme.
Note: If necessary, find your common layout (iiilay01) and use the context menu Cross References option to find the external resources being used.
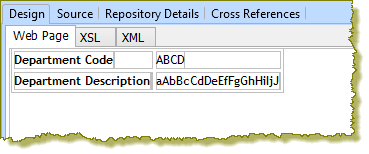
Your design should now look like the following:
6. Save your changes.