Step 4. Add a Push Button Weblet
WAM030 - Employee Enquiry
In this step you will add a column to the table containing employee number, and drag a push button weblet into the new cell.
1. Notice that the table is shown in the editor with a double line border. This is to make the table visible for editing. The table will not have a border when you run the WebRoutine in the browser, unless you have edited the table definition and defined a border.
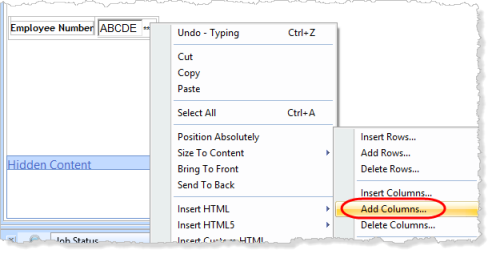
If you click anywhere in this table, you can use the right mouse menu (also known as the context menu) to select the Table Items menu. Hint: Select the employee number input box and move the cursor right to position into the table cell.
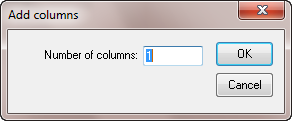
Select the Add columns… option to add a column(s) to the right hand side of the table.


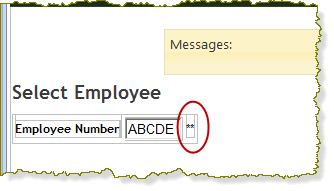
You should now see something like this:

Note that the new column contains characters **. These are placeholders so that it is easy to drag and drop into this cell. You will later remove them.
2. On the tab, select the  tab. Ensure that is selected using the dropdown list at the top of this tab. Drag and drop a Push Button into the new cell at the right hand side of the table:

3. Use the keyboard cursor keys to position into the table cell that now contains the pushbutton and delete the two asterisks (they have done their job). For example select the push button and move right using the cursor key. You are now positioned in the table cell (you have the <td> tag selected) and can delete the * character.
a. Set focus on the push button, select the  view to show the weblet's .
b. Set the of the button to Details. Note: quotes are not required.
c. Set the property to Details (note that you have not yet written a WebRoutine named 'Details').
d.Click the ellipsis buuton for the submitExtraFields property. Complete the dialog:
Select field EMPNO
Enter EMPNO and select radio button
Click .
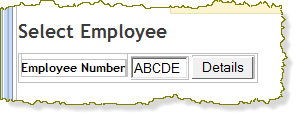
Your Design view should now look something like this:

4. Save your changes. In the view you are actually editing an XSL document.It is good practice to save your work regularly.