Step 4. Define the Details WebRoutine
WAM060 - Employee Maintenance using Advanced Weblets
The Details WebRoutine:
- Will be invoked by selecting an employee in the employees list, using the Anchor weblet (also known as a hyperlink). Output for the Details WebRoutine will be shown on the ShowPage web page.
- Output will be displayed in the Navigation Panel on the right of the Vertical Splitter.
- Will handle display and update of employee and employee skills data. It will also handle adding a new skill for the employee.
1. At the top of your WAM, begin by defining fields, lists or group_by that will be required to support the Details WebRoutine.
a. Define a working list, EMPSKLS for employee skills containing SKILCODE, GRADE, COMMENT, DATEACQ, DATEACQR and EMPNO . DATEACQR and EMPNO should be hidden.
b. Define a work field EMPNOW based on EMPNO
c. Define a group_by, EMPDATA containing fields EMPNOW, SURNAME, GIVENAME, ADDRESS1, ADDRESS2, ADDRESS3, POSTCODE, PHONEBUS and PHONEHME. EMPNOW should be output.
Your code should look like the following:
Def_List Name(#empskls) Fields((#SKILCODE *out) #GRADE #COMMENT #DATEACQ (#dateacqr *hidden) (#empno *hidden)) Type(*Working)
*
Define Field(#empnow) Reffld(#empno)
Group_By Name(#empdata) Fields((#empnow *out) #SURNAME #GIVENAME #ADDRESS1 #ADDRESS2 #ADDRESS3 #POSTCODE #PHONEHME #PHONEBUS)
2. Create a Details WebRoutine. Initially you will create a simple version of this WebRoutine and then extend it.
a. Map field EMPNO for both as a hidden field.
b. Map for both, Group_by, EMPDATA and list EMPSKLS. EMPSKLS should be mapped with a *private attribute. *Private means it will not be automatically shown on the web page.
Your code should look like the following:
WebRoutine Name(Details)
Web_Map For(*both) Fields((#empno *hidden))
Web_Map For(*both) Fields(#empdata (#empskls *private))
Endroutine
3. In this step you will add logic to your Details WebRoutine using a CASE loop for STDRENTRY (this is mapped globally as a hidden field).
Note the following:
Code your Details WebRoutine based on the following:
- Change EMPNOW to EMPNO
- Case loop on STDRENTRY
- When = D
- When = U
Your code should look like the following:
WebRoutine Name(Details)
Web_Map For(*both) Fields((#empno *hidden))
Web_Map For(*both) Fields(#empdata (#empskls *private))
Web_Map For(*both) Fields((#skilcode *hidden))
#empnow := #empno
Case (#stdrentry)
When (= D)
Fetch Fields(#empdata) From_File(pslmst) With_Key(#empno)
Clr_List Named(#empskls)
Select Fields(#empskls) From_File(pslskl) With_Key(#empno)
Add_Entry To_List(#empskls)
Endselect
* update employee
When (= U)
Update Fields(#empdata) In_File(pslmst) With_Key(#empno) Val_Error(*next)
If_Status Is_Not(*okay)
Message Msgtxt('Error occurred on employee update')
Else
Message Msgtxt(' Employee ' + #empno + ' was changed')
Endif
Endcase
Endroutine
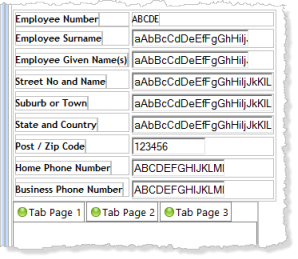
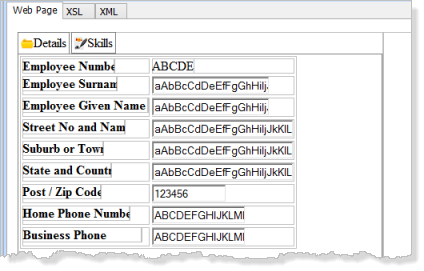
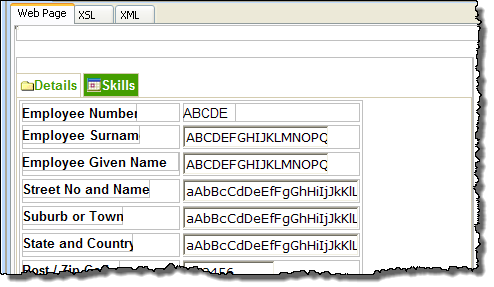
4. Compile your WAM and open the Details WebRoutine in the view.
Your web page should look like the following:

5. Drag and drop a weblet (not ) onto the page.
a. Click on the Tab Pages weblet to select it. On the tab set up its properties by clicking on the  button, that will open the dialog:
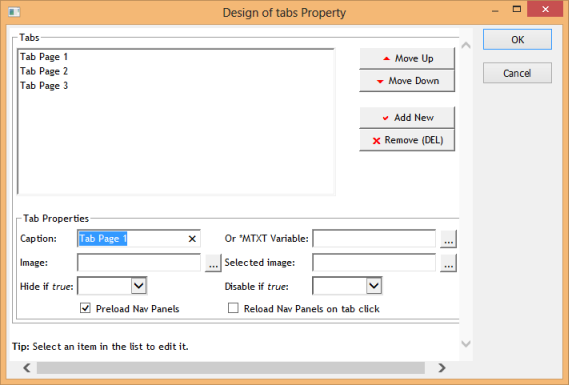
b. Select each tab page entry in the list and set up its properties:
|
|
c. Delete Tab Page 3.
d. Save your changes by clicking OK.
6. Click on the weblet to select it and set its height and width properties:
|
7. Save your changes. Your page should now look like the following:
8. Click on a corner of the employees fields table to select it. Use the context menu to select .
a. Click on the Tab Pages weblet to select it.
b. Click on the tab to ensure the correct tab sheet is selected.
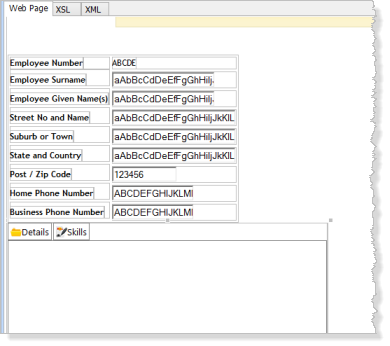
c. Use the context menu to the table into the tab folder tab.
Your page should now look like the following:
9. Save your changes.
10. Click on the Skills tab to select it and drag and drop a onto the tab page.
11. Select the Grid and set up its properties:
|
12. Click on the tab page and save your changes. This will make , the default tab at run time.
13. The Details web page will be displayed inside the on the ShowPage web page. The Details web page therefore requires a blank layout.
a. On the tab, using the dropdown at the top, select :
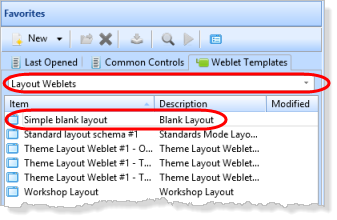
b. Drag and drop the onto the page. Your design should now look like the following:
14. You need to ensure that this blank page adopts the same theme as your common layout iiilay01.
a. On the tab, select in the top dropdown list.
b. Right click on the layout and use the context menu to select
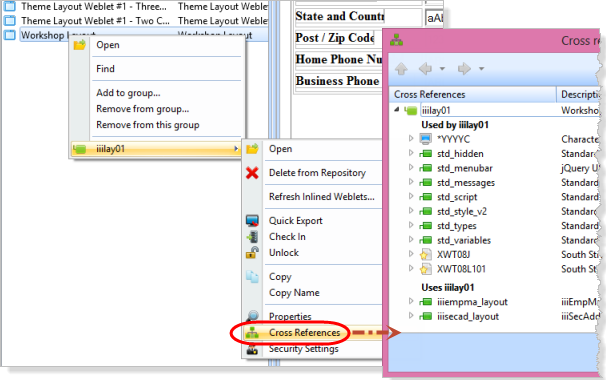
c. Make a note of the being used. In this example these are XWT08J and XWT08L1.
Close this dialog.
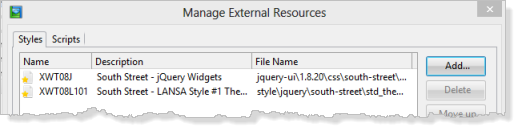
d. In the view for WebRoutine Details, on the Design ribbon, select the button. Use the button to add the two Styles required.
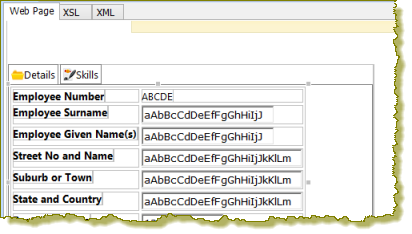
e) Your should now look like the following, but refelecting your chosen theme:
Note the Font used for the field labels.
Note also the background used for a non-selected tab. The color may not be shown in the view. Check your results in the next step.
15. Save your changes.
16. Execute the ShowPage WebRoutine in the browser to test your application:
- Selecting an employee should display details on the right side of the Vertical Splitter. The tab will be shown initially, as it was saved as the default.
- Selecting the tab will display a grid of employee skills.
- Selecting another employee will display the Details tab again.
Later you will enhance the application to remember the current tab and display it for the next employee selected.