Step 5 Create WebRoutine Details
From LANSA WAM
Step 5. Create WebRoutine: Details
WAM030 - Employee Enquiry
1. Select the Source tab to return to your WAM's RDMLX code and add a new WebRoutine named Details.
This WebRoutine needs to:
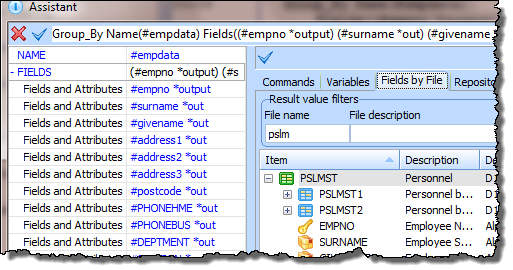
Hint #1 : Remember it's a good programming technique to use a GROUP_BY to define a set of fields. You can also use a GROUP_BY to map fields into or out of the WebRoutine. Remember to set all fields in the group as *OUTPUT to ensure they are displayed and cannot be changed (you can also use *OUT to save on typing).
Hint #2: Always create a GROUP_BY command with the . This dialog allow you to quickly select fields from a file definition. You can then also define the *out attribute against each field, while using this dialog.
To do this, click in one of the Fields and Attributes values, use the cursor key to move right, then type space, followed by *out.
Hint #3 : Think about what fields are "input" to the WebRoutine and which fields are "output" from the WebRoutine (to be displayed on the web form). This affects the For() parameter required on the web_map.
Hint #4: As with all database programming, consider how to handle an error condition. For example you could use an IF_STATUS to display an error message if the Employee record is not found. The LANSA I/O status is returned as field IO$STS and the IF_STATUS command compares with this field.
Hint: #5: In a WAM, a validation error on an I/O command will branch to the EndRoutine, unless you have written VAL_ERROR(*next).
Your WAM code should now look like the following:
Function Options(*DIRECT)
Begin_Com Role(*EXTENDS #PRIM_WAM) Layoutweblet('iiilay01')
Group_By Name(#empdata) Fields((#empno *output) (#surname *out) (#givename *out) (#address1 *out) (#address2 *out) (#address3 *out) (#postcode *out) (#PHONEHME *out) (#PHONEBUS *out) (#DEPTMENT *out) (#SECTION *out) (#SALARY *out) (#STARTDTE *out) (#TERMDATE *out))
WebRoutine Name(begin)
Web_Map For(*output) Fields(#empno)
Endroutine
Webroutine Name(details) Desc('Employee Details')
Web_Map For(*output) Fields(#empdata)
Fetch Fields(#empdata) From_File(pslmst) With_Key(#empno) Val_Error(*next)
If_Status Is_Not(*OKAY)
Message Msgtxt('Employee not found')
Endif
Endroutine
End_Com
2. Compile your WAM. The changes you made to the "Begin" WebRoutine web page will be retained. XSL and XML will be built for your new WebRoutine only, as part of the compile.
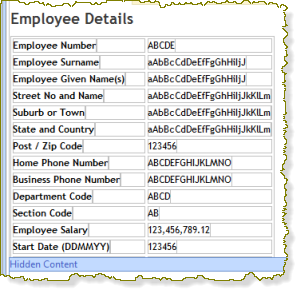
3. To open the Design view for the Details WebRoutine, use the ![]() icon in the source code. Your web page should look like the following:
icon in the source code. Your web page should look like the following:
4. The fields DEPTMENT and SECTION may have a dropdown weblet visualization defined in the Repository. In this case their value will not be shown when they are output fields. You will be using field visualizations in a later exercise. If their value is not currently shown, select each in turn and use the context menu option . This will display these fields as normal output fields.
Save your changes using the ![]() button on the toolbar.
button on the toolbar.
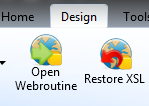
5. On the ribbon click on the button.
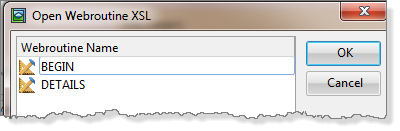
Select the Begin WebRoutine and click to display it in the view.
6. On the toolbar, click the ![]() icon to execute the WAM in the browser. Your web page should look like the following:
icon to execute the WAM in the browser. Your web page should look like the following:
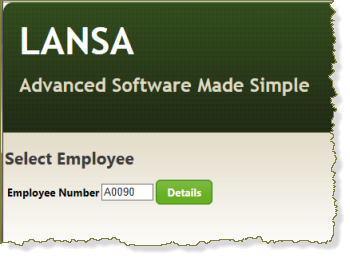
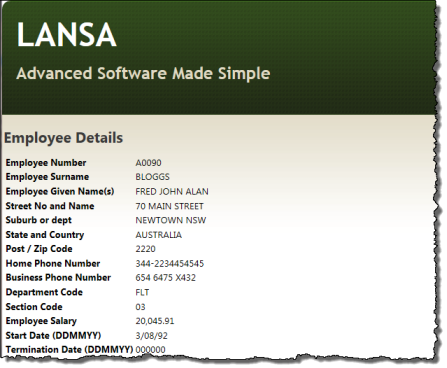
Enter an Employee number (for example, A0070, A0090 or A1234) and the button.
The details web page should then be displayed.
To select another employee, return to the Select Employee by using the browser back button. In later exercises, you will learn how you to add a button on the Details page to return to the Begin WebRoutine.
7. You have completed this exercise.