Step 9 Insert a fieldset around each table
From LANSA WAM
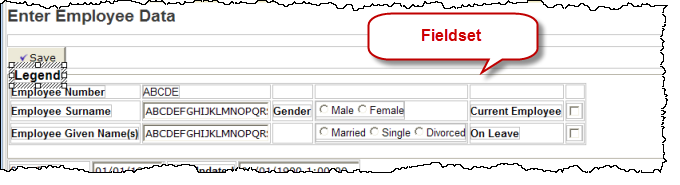
Step 9. Insert a fieldset around each table
WAM085 - Enhancing the User Interface
In this step you will insert a fieldset around each table. This will display a round cornered group box around each area. You will also add a legend tag in each fieldset to display a caption.
Lastly, in the view you will insert a div around each fieldset and size it. You are doing this to size the fieldset that will otherwise have the same width as its container. It is possible to size the fieldset by giving it a class and using CSS, but a bug in IE would then display the fieldset with square corners. Adding the div avoids this issue.
1. Select the top table containing employee details. Select a corner of the table. Alternatively, select anywhere in the table and use the tab, to select the table itself.
The Design view should now look like the following:

Note the "handles" around the table that is currently selected.
2. Use the right mouse button over one of these "handles" and select to insert a fieldset around this table. Your design should look like the following:
3. Click in the Legend text area and replace it with Personal Details.'
4. Select the table containing Start Date and insert a fieldset around this table, with and replace Legend text with Dates.
5. Select the table containing Comments and insert a fieldset around this table with the legend Comments.
6. Save your changes.

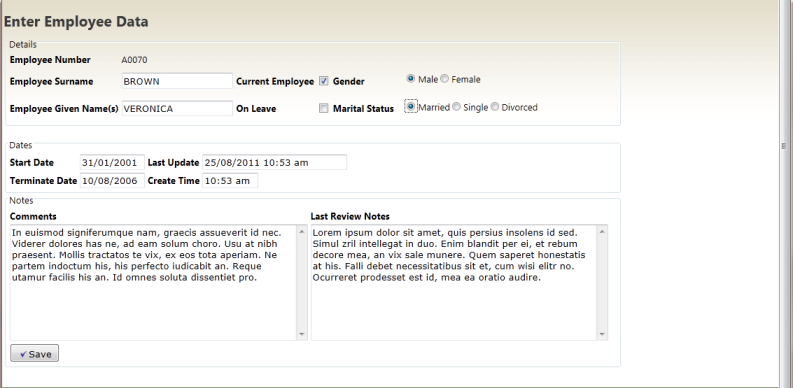
7. Run your application to see the results in the browser. Enter some data. Your page should look like the following:
Notice that the group boxes span the full width of the web page. The screen shot has minimized the page width. With the browser maximised on a large screen the blank areas on the right look a little unfinished.
The web site http://lorem-ipsum.perbang.dk/ may be used to generate 'mock latin' text to fill up your memo boxes.
8. With the showpage WebRoutine open in the view, select each fieldset border and use the context menu to a Div. Check you have selected the fieldset by looking at the sheet on the tab. It should display <fieldset> at the top. Use the context menu to around the fieldset.
9. With the Div selected use the tab, to expand the properties and change the to 80%.
10. Repeat the last two steps for the other two fieldsets.
11. Save your changes.
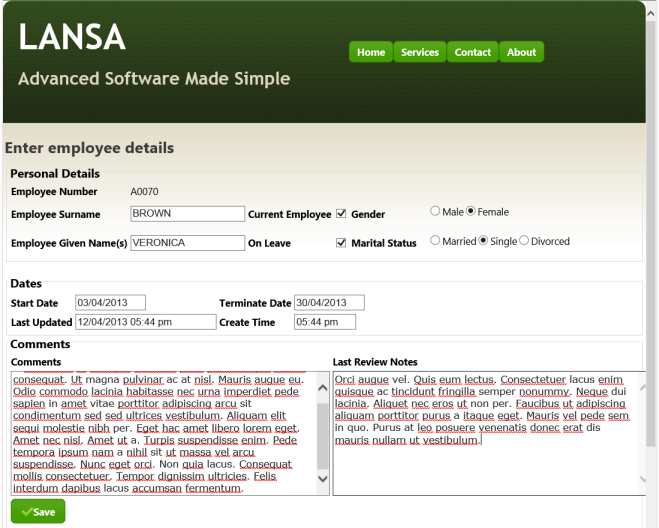
12. Run the application. Your web page should now look like the following: