Layout Designer Interface Rows
From Alchemex 7.1
Home > Report Designer > The Interface > Layout Designer Interface > Row Area
Row Area
(What information do you want to see down the left hand side of the layout ?)
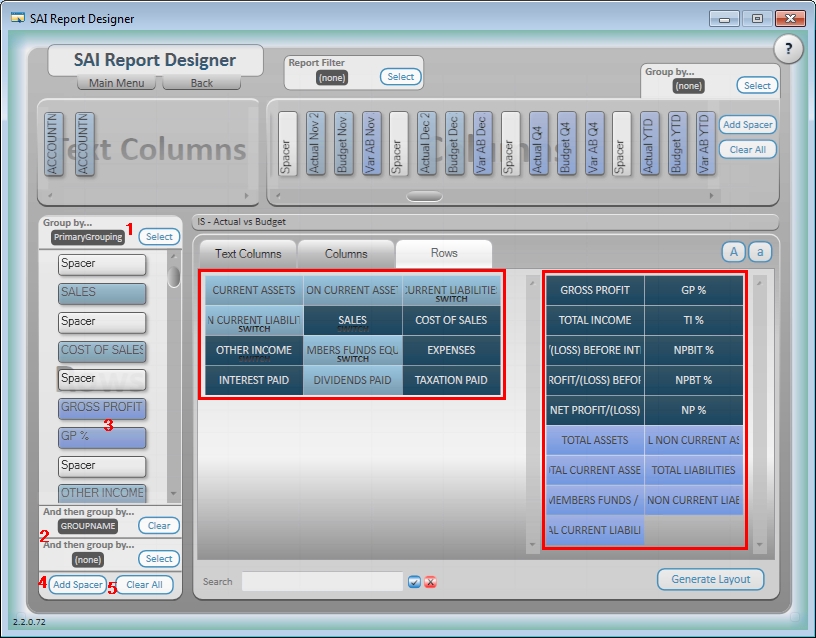
- Before you can add rows into the Row area you need to select a Primary Row to Group by. The Primary Row Grouping is mandatory. An example of a primary row grouping is Financial Category, GLCategoryDescription, Account Group, Main Account. Again this will differ for the Accounting or ERP application you are using..
- You can add a further 2 levels of grouping to the row area if required. In total there are 3 levels of grouping available in the row area.
- You can now add your fields from the Rows Tab into the Rows area. For example: Sales, Cost of Sales, Income, Expenses. Or you can pull fields through from standard calculated row fields such as Gross Profit, Gross Profit %. These standard calculated fields will ship with the Report Designer layouts but you are able to edit, add new or delete calculated fields.
- Add Spacer button simply adds a space between fields in the row area. Spacers can be dragged and moved to neaten your report layout when delivered in Microsoft Excel.
- Clear All buttons will clear all the Row fields from the Row area.