Creating and linking a report
From Alchemex 7.1
Home > Getting Started Guide > Creating and Linking a Report
Creating and Linking a Report
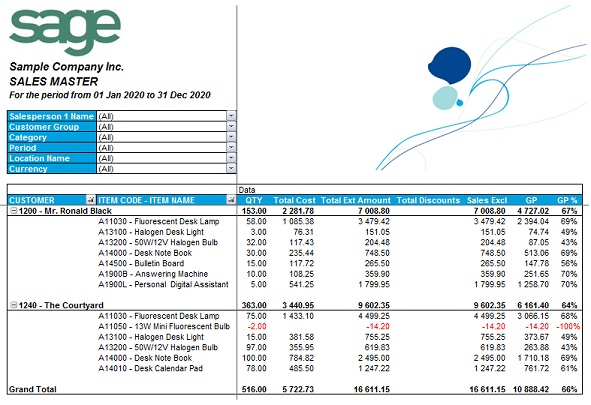
It is entirely possible to customize the look and layout of the Sage Intelligence Reporting Standard Reports. Although these reports are designed to encompass the needs of most business organizations, you may want to change the appearance (colors, text style, etc.) to reflect your company image, and perhaps change the order or inclusion of columns to suit your company processes. These changes can be saved for the next time you run the report.
Creating Microsoft Excel templates enables the user to create a template from an open Microsoft Excel workbook and link it to an existing report so as to standardize the output format of the chosen report for every run instance in future.
Note: If you are unsure of making changes to any of the Standard Reports, you should create a copy of the report before you make any changes.
Sage Intelligence Reporting users must make a copy of a report in order to edit the standard reports.
To copy a report
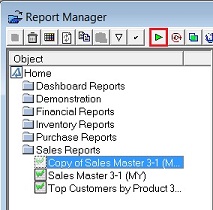
Open the Sage Intelligence Reporting Report Manager.
Right-click the report you want to copy and select Copy.
Right-click on the report folder in which you want to paste the copy and select Paste. The copy of the report is renamed as Copy of and the original report name.
To create and link the Report
Open the Sage Intelligence Reporting Report Manager.
Select and run the report you want to customize.
Make the changes to the report; ensure that Sheet1 (where Sage Intelligence Reporting puts the Raw Data) and Sheet2 (where Sage Intelligence Reporting puts the report parameters) are unchanged.
After completing the changes, leave the workbook open and go back to the Report Manager.
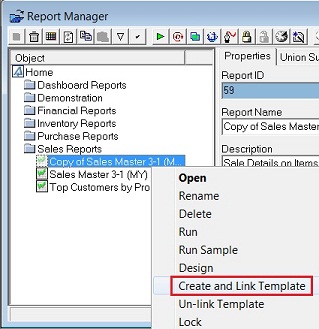
Right-click on the report for which the changes were made and select Create and Link Template.
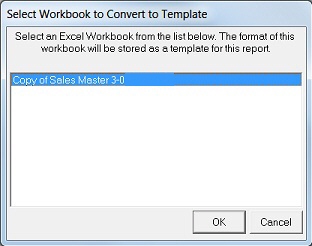
Select the Microsoft Excel workbook with the changes in the window that appears. Please note that all Microsoft Excel workbooks that you have open will be listed in the pop up window, so make sure you select the correct Microsoft Excel workbook to create and link.
Click OK.
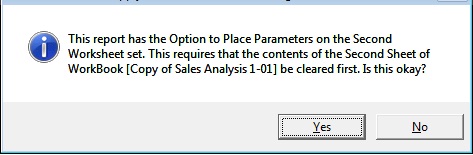
When the following window appears, click Yes to link the workbook. Clicking No will not link the workbook.
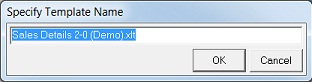
When prompted to specify the template name, change the name of the template. Doing so ensures that the original template is not overwritten with the copy.
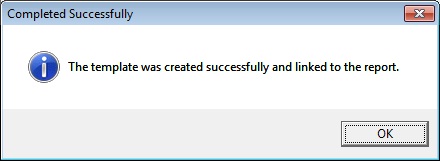
Click OK. Once the template has been successfully linked, a confirmation window appears.
Click OK.