Advanced settings: Parameters
From Alchemex 7.1
Home > Tutorials > Report Manager Tutorial > Advanced Report Settings > Advanced Settings: Parameters
Advanced Options - Parameter Exercise
Parameter Exercise
A user has requested reports that fall between specified dates. You are required to set the report dates when you run the reports. Complete the following steps to create a report that enables you to set the dates at run time using two date parameters.
Step 1: Copy the report and remove the filter
Create a copy of the previous report and do the following:
- Rename the report: Customer Documents History - Parameters
- Remove the filter from the report
Step by Step Solution
- Right-click on the Customer Documents History - Current Year report and click Copy.
- Right-click on the Training folder and click Paste.
- Right-click on the new report and click Rename. (shortcut key – F2)
Enter the name Customer Documents History with Parameters in the Rename dialog box and click on OK. A dialogue box presents template options as shown in the figure below.
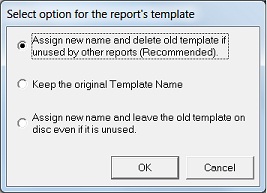
- Leave the default option selected and click OK. A copy of the report is created and displayed the training folder.
- Click the Filter tab on the Property window.
- Select the Period filter and click Remove.
- Click OK to confirm the deletion. The filter is removed from the report.
Step 2: Set the parameters
Set the following parameters for the report:
- First Parameter
- Filter Field: Date
- Operator Name: Greater than or Equal to
- Comparator/default option: (blank)
- Second parameter
- Filter Field: Date
- Operator Name: Less than or Equal to
- Comparator/default option: (blank)
Step by Step Solution
- Select the report.
- Click the Parameter tab.
- Click the Add button on the right of the property window.
- From the Choose a Filter Field dialog box, click Date then click OK.
- From the Choose Comparison Method dialog box, click Greater than or Equal to then click OK.
- Leave the Comparison Value value blank (this value will be set at run time) then click OK. The parameter is displayed in the Parameter window.
- To set the second parameter, click the Add button again on the right of the property window.
- From the Choose a Filter Field dialog box, click Date then click OK.
- From the Choose Comparison Method dialog box, click Less than or Equal to then click OK.
- Leave the Comparison Value value blank (this value will be set at run time) then click OK. The parameter is displayed in the Parameter window.
Step 3: Run the report
Run the report setting the parameters to reflect the month of April 2003 (01/04/2003 – 30/04/2003). Check the output result against the diagram below.
Step-by-Step Solution
- Click the Run button. The Parameter dialog box prompts you for the dates.
- Click the Browse button and enter the following dates:
- Greater than or Equal to: 01/04/2003
- Less than or Equal to: 30/04/2003
- Click OK. The data is exported to Microsoft Excel.
Compare the output to the figure below to ensure that it is correct.
Note:The dates must reflect only transactions between 01/04/2003 and 30/04/2003.
Step 4: Link the Microsoft Excel report back to Sage Intelligence Reporting
Link the resulting workbook to the Report Manager as a template.
Step-by-Step Solution
- Select the Customer Documents History with parameters report in the Report Manger.
- Click the Create and Link Template button.
- Select the Customer Documents History with parameters1 book and click OK. The Specify a Template name dialog box is displayed.
- Leave the default name unchanged and click OK. The Microsoft Excel workbook is converted to a template and linked to the report.
- Ensure the Report Manager is active for the next exercise.