Connecting_to_a_Data_Source
From Alchemex 7.1
Home > Tutorials > Connector Tutorial > Connecting to a Data Source > Connecting to a Data Source
Connecting to a Data Source
Overview
You have been requested to create a report based on the Document Header table from your company database. Your first task is to create a connection to the database. Complete the following exercises to achieve this objective.
Exercise 1: Connecting to a Data Source
Connect to the data source using the details listed below. Use the help topic Add a Data Connection to assist you with this task.
We run an Access database with the following details:
- Data Connection Type: ODBC Driver for Access
- Data Connection Name: RKL Trading Demo
- Database Location: The position of the server folder depends on where the Sage Intelligence Reporting software was installed. Ask your network administrator for the exact location.
- Database name: RKL Trading.mdb
- User Name and Password: (blank)
Step-by-Step Solution:
Create the data connection by doing the following:
- Open the Connector.
- Double-click on the Enterprise icon in the Object window. All connection types are displayed.
- Right-click on the ODBC Driver for Access and select the Add Connection from the displayed shortcut menu.
- Use the details provided in the exercise to enter the Connection Name in the Connection Name field.
- Use the Browse button on the right of the Access Database field to navigate to the database's location.
- Select the RKL Trading.mdb database and click Open. The Select Access database dialog box is closed.
- Click Add in the Connection Info dialog box. The dialog box closes and the data connection is displayed below the ODBC Driver for Access connection type.
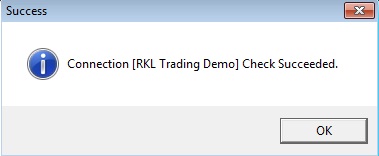
Exercise 2: Check the Connection to a Data Source
Check the connection is connected correctly to the data source. Use the help topic Check/Test to guide you with this task.
Step-by-Step Solution:
Check the connection by doing the following:
- Right-click on the connection you have just created: Exercises.
Select Check/Test. The Check/Test success dialog box is displayed.