Add the Visual Basic Form
From Visual LANSA
Add the Visual Basic Form
In this step you create a Visual Basic form which uses the LANSA ActiveX form:

To create this form:
1. Close Visual Basic.
2. Start Notepad, open the form (Form<n>.frm) created in the General Setup Tasks.
3. Replace the code in Notepad with the source code from Case 1 - Visual Basic - Object, then Save.
4. Start Visual Basic and open the Project (Project<n>.vbp) created in the General Setup Tasks.
5. Open the form (Form<n>.frm)
6. Copy the source code from Case 1 - Visual Basic - Code to the form's code, then Save.
7. Right click in the Visual Basic toolbox and select components from the pop-up menu.
8. Scroll down and check LANSA.AXFORMA. This will add a LANSA icon to the toolbox.
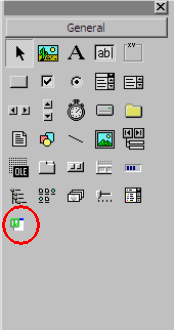
10. Click on the AXFORMA icon to select it and on the form drag out a rectangle and release the left mouse key. The LANSA ActiveX form has now been added to the Visual Basic form:
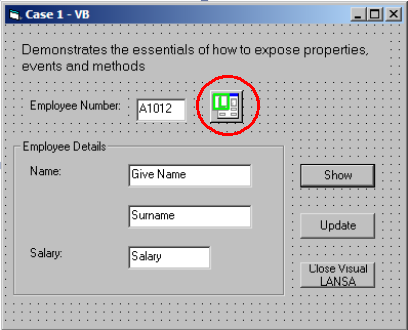
11. Display the properties of the form and change its name from AXFORMA1 to AXFORMA.
Notes:
- If your Toolbox is not displayed, click View then Toolbox.
- To view the form's user interface design, Click View, then click Object from the Menu or the Project Pane.
12. In the Visual Basic LOAD routine (Private Sub Form_Load) modify the login script to your requirements. For example:
Call ConnectToLansa("user1", "mypassword", "c:\ActiveXTests\session.cfg")
13. Save, then compile the Visual Basic Project using the Make Project<n>.exe option in the File menu.
You can now view the sample Personnel data by executing the program and typing in an Employee Number, then clicking on Show.