6.9.4 A LANSA 'Work with' Function and Form
The previous example was simplified to make a code comparison easy. To give you a more realistic view of what can be done with the two programming methods, here is an example of a 'Work with' type of application implemented as a LANSA function and as a Visual LANSA form.
Both applications are used for maintaining information in the sample PSLMST file. They use a logical view of the file which is keyed by employee surname. You can use them to view, edit and delete employee details.
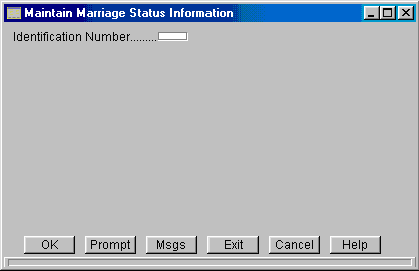
The LANSA function was created using the FRMWRK1 template. It has a screen where you can limit the employees to be shown by entering a partial surname:
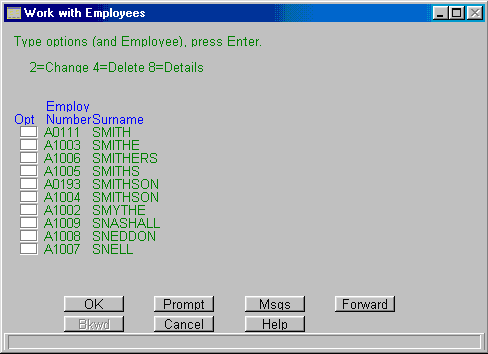
When you click OK, a Work with Employees screen is displayed. This screen shows a list of employees whose names match the partial name. You can view, modify or delete employee information by entering a number in the Opt field.
When you choose the Change option, a screen with input capable fields is displayed.
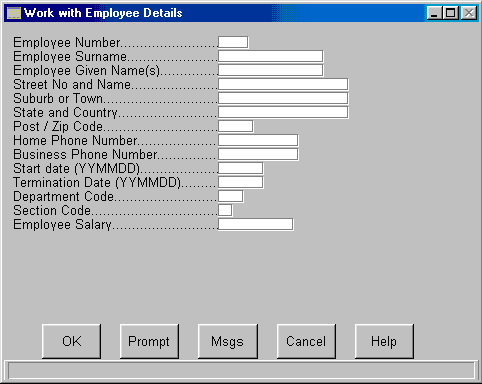
Similarly, selecting the Details and the Delete options brings up a screen showing the same information but with input protected fields.
Note that:
- This application consists of several screens. One screen can only be used for one specific purpose (often corresponding to the mode: change, delete or display).
- The sequence in which the screens are displayed is predefined. For example when you have changed employee details, the Request Employee to Work with Screen is displayed. When you have viewed the details, the Work with Employee screen is displayed.
Depending on what you are doing this might or might not be the order in which you would want the screens to be displayed but you cannot change it. - Because of the number of screens, there is quite a bit of navigation involved. For example comparing employee information is difficult because you must bring up a separate window to view the details individual employees.
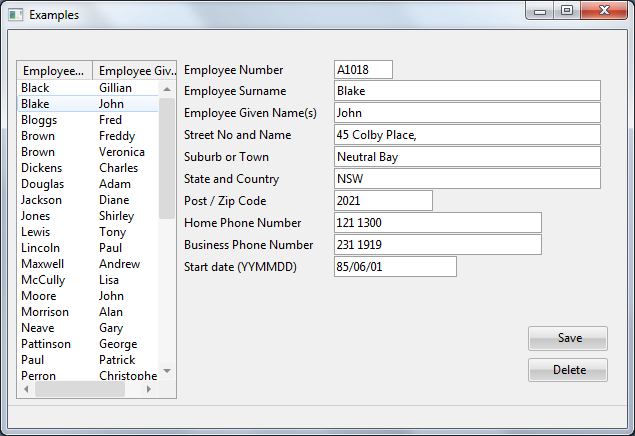
The Visual LANSA application consists of a single form. It performs the same actions as the LANSA function above. It has:
- A list of employees
- Several fields
- A button to save changed employee details, a button to add a new employee and a button to delete employee records.
Note that:
- This application consists of a single window, so all information is visible immediately.
- No navigation is required. You can use one and the same window to filter employees by surname, select an employee, display details, change the details and delete the details.
- You can perform actions in whatever order you want. For example it is up to you to decide when (and if) you want to change the partial surname.
- You can check and compare information quickly and easily.
An application like this can only be created because individual controls have their own event routines. Because the event routines are executed individually, the window can change dynamically according to user actions:
- When you press the Get button, a SELECT statement is run and the list is filled:
EVTROUTINE HANDLING(#Get.Click)
change #surname #partname
clr_list #list_1
SELECT FIELDS(#list_1) FROM_FILE(PSLMST2)
WITH_KEY(#SURNAME) GENERIC(*YES)
add_entry #list_1
ENDSELECT
ENDROUTINE
- When you select an employee in the list, the details for that employee are fetched:
EVTROUTINE HANDLING(#List_1.ItemGotSelection)
FETCH FIELDS(#ALLFLDS) FROM_FILE(PSLMST) WITH_KEY(#EMPNO)
ENDROUTINE
- When you click the Save button, the details are updated:
EVTROUTINE HANDLING(#SAVE.CLICK)
UPDATE FIELDS(#ALLFLDS) IN_FILE(PSLMST) WITH_KEY(#EMPNO)
ENDROUTINE
- When you click the Delete button, the details are deleted:
EVTROUTINE HANDLING(#DELETE.CLICK)
DELETE FROM_FILE(PSLMST) WITH_KEY(#EMPNO)
ENDROUTINE
An application like this could not be implemented as a LANSA function because in a function the entire screen is processed as a whole.