6 19 3 Create a Two Form Application
From Visual LANSA
6.19.3 Create a Two Form Application
This section describes how to create the application.
Step 1. Create Two Separate Forms First
You started off by creating two separate forms. One was named WRKEMP and the other one FRMDETAIL. When the forms were created they were stored in the group Demonstration Material.
|
It is easier to manage your application if you put all its forms in the same group or framework. Often you might want to create a group for the application.
You then design the user interfaces and the basic functionality for the forms in the editor:
1. Make the caption of WRKEMP 'Work with Employees' and create a list view with employee details. Add a menu with menu options.
2. Write the logic to fill the list in the Initialize event of the form.
3. Make the caption of FRMDETAIL 'Employee Details' and include several fields showing employee address information.
4. Add two command buttons. The Click event of the OK command button updates the employee details and closes the form; the Click event of the Cancel button just closes the form.
Now create the individual forms. This is always the first step of creating a multi-form application.
Step 2. Include the Employee Details Form in the Work with Employee Form
Make WRKEMP the main form of the application. When you create a multi-form application, you must have a main form. When the application is run, the main form can control the other forms in the application by setting their properties, invoking their methods and responding to their events.
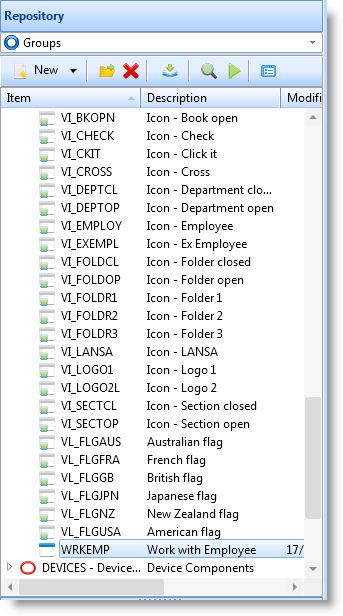
Open WRKEMP in the editor. Then open the DEMONSTRATION group in the Groups tab of the Repository tab. This group shows all the forms that have been stored in this group.
Include the FRMDETAIL form in WRKEMP by dragging FRMDETAIL to the open form. A component definition statement is automatically added for it:
DEFINE_COM CLASS(#FRMDETAIL) NAME(#FRMDETAIL) HEIGHT(296) LEFT(326) TOP(172) WIDTH(494)
You have now established the basic structure of the application: WRKEMP is the main form which owns FRMDETAIL.
WRKEMP is also called the owner form of FRMDETAIL. Similarly, FRMDETAIL can be referred to as a member form of WRKEMP.
FRMDETAIL is now shown as a member component of #WRKEMP in the Outline tab.
Owner Form and Member Forms
When you include a form in an owner form, you are actually including an instance of the form. (For information about instances, refer to 6.8 Component Basics). This means that:
- WRKEMP only contains a reference to FRMDETAIL. To edit FRMDETAIL you must open it in the editor.
- You can execute FRMDETAIL as a stand-alone form (although then it cannot communicate with WRKEMP). You can also include it in another form in another application.
- You can override the properties of FRMDETAIL when it is used inside WRKEMP and write code for its events. The changes you make to this instance do not change the FRMDETAIL component itself.
- You can display several instances of FRMDETAIL simultaneously. You have to do this if you want the user to be able to view the details of more than one employee at the same time. For more information, see 6.19.4 Show Multiple Instances of FRMDETAIL
Working with Multiple Forms
Now that you have created the forms, keep both of them open in the editor and moved between them using the Outline tab.
Establishing Communication between the Forms
Establish how the two forms communicate with each other when the application is run. Owner forms can control the other forms using their properties, methods and events.
The owner form WRKEMP can:
- Set and retrieve the property values of FRMDETAIL. These properties can be the standard properties associated with forms or custom-defined properties.
- Invoke the methods of FRMDETAIL. The methods can be standard or user-defined.
- Respond to the events of FRMDETAIL. Again, the events can be standard events or user-defined events.
WRKEMP cannot see what is inside FRMDETAIL
It is very important to note that WRKEMP can only use the properties, methods and events of the FRMDETAIL form itself, not of any of the fields or controls on it.
For example WRKEMP cannot set or retrieve the value of the #EMPNO field on FRMDETAIL, nor does it know about the OK or Cancel buttons.
Standard Form Properties, Events and Methods
All forms have these standard properties, methods, and events:
|
Properties |
Height, Width, Top, Left, Caption etc. |
|
Methods |
ActivatForm, CloseForm, CloseFormQuery, HideForm, ShowForm, ShowModalForm MinimizeForm, MaximizeForm, RestoreForm |
|
Events |
Activate, Closing, CloseQuery, Deactivate, GotFocus, Initialize, LostFocus |
For example the owner form WRKEMP form could use FRMDETAIL's standard properties, methods and events to:
- Move or resize FRMDETAIL or change its caption. This statement on WRKEMP will move FRMDETAIL:
SET com(#frmdetail) left(37) top(14)
- Show or hide FRMDETAIL. This statement will show it:
invoke #frmdetail.ShowForm
- React somehow when FRMDETAIL is initialized or closed. This event routine monitors for its Closing event:
EVTROUTINE HANDLING(#frmdetail.Closing)
<< do something >>
ENDROUTINE
However, of all of the above only the ShowForm and CloseForm methods were needed in our sample application.
Moreover, none of these standard properties, methods or events provide the means to establish the kind of communication between the forms that is required in our application. Therefore you define additional user-defined properties, methods and events to FRMDETAIL.
User-defined Properties, Events and Methods Were Required in FRMDETAIL
User-defined properties, methods and events in FRMDETAIL were needed so that WRKEMP could:
- Pass the current employee number to FRMDETAIL
Data is typically exchanged between forms using properties, so add a property which communicates the employee number. - Ask FRMDETAIL to fetch the details of the current employee
Actions are requested using methods, so add a method to FRMDETAIL which can be used to ask it to fetch the details. - Know when the OK button on FRMDETAIL is clicked.
The fact that something has happened is signaled as an event, so add an event to FRMDETAIL.
Note that because the owner form WRKEMP can use the member form's properties, methods and events, all these changes are made to FRMDETAIL. No properties, methods, and events are added to WRKEMP because FRMDETAIL could not use them.
Step 3. Add User-defined Properties, Methods and Events to FRMDETAIL
This section shows how the user-defined properties, methods, and events was added to FRMDETAIL.
3a. Adding Employee Property to FRMDETAIL
To make it possible to pass the employee number from WRKEMP to FRMDETAIL, create a user-defined property called Employee in FRMDETAIL. Define it by adding the following statement:
Define_pty name(Employee) set(*auto #empno) get(*auto #empno)
This statement specifies that FRMDETAIL has an Employee property which can be set and retrieved by an owner form at run time. The SET parameter specifies that the value passed to this property is automatically assigned to the #EMPNO field on FRMDETAIL. The GET parameter specifies that when an owner form queries the value of the Employee property, the current value of field #EMPNO on FRMDETAIL is returned.
3b. Adding GetInfo Method to FRMDETAIL
The user-defined method GetInfo was added to FRMDETAIL so that it could be asked to fetch the details of the current employee. This is the definition of the method in FRMDETAIL:
mthroutine name(GetInfo)
fetch fields(#detflds) from_file(pslmst) with_key(#empno)
endroutine
You may wonder why the FETCH statement wasn't put in one of the events in FRMDETAIL. The reason is that in our sample application none of the events of FRMDETAIL are suitable for executing the FETCH statement:
- The Initialize and Activate events are triggered before a value is passed to the Employee parameter
- The Changed event of the #Empno field is not triggered when the value is changed programmatically.
3c. Adding an OKPressed Event to FRMDETAIL
To make it known that the OK button on FRMDETAIL has been clicked, a custom-defined event was specified on FRMDETAIL:
define_evt name(OKPressed)
It was specified that this event is signaled when the OK button is pressed on FRMDETAIL by adding a SIGNAL statement to the Click event of #OKBTN:
EVTROUTINE HANDLING(#OKBTN.Click)
signal event(OKPressed)
ENDROUTINE
So now every time the #OKBTN.Click event is triggered in FRMDETAIL it signals the OKPressed event to an owner form.
The Modified FRMDETAIL
As a result of the modifications, FRMDETAIL now has a user-defined property, method and event which can be used by WRKEMP to communicate with it:
|
Property EMPLOYEE
|
To be used to set and retrieve the value of the #EMPNO field in FRMDETAIL. Define_pty name(employee) set(*auto #empno) get(*auto #empno)
|
|
Method GETINFO
|
To be used to instruct FRMDETAIL to fetch the details of selected employees. mthroutine name(GetInfo) fetch fields(#detflds) from_file(pslmst) with_key(#empno) endroutine
|
|
Event OKPRESSED
|
Which tells other form that the OK button has been pressed on FRMDETAIL. define_evt name(OKPressed) signal event(OKPressed) |
You may want to have a look at the 6.19.7 Source Code for the Multi-Form Example Forms .
Even though these properties, methods and events were added on FRMDETAIL specifically to be used by the WRKEMP form in this sample application, they are, of course, available to any other form in which FRMDETAIL is included. In other words if you create another application in which FRMDETAIL is included, these properties, methods and events would be available to its owner form in that application.
Step 4. Modify WRKEMP to Communicate with FRMDETAIL
Now WRKEMP is modified to communicate with FRMDETAIL.
4a. Showing FRMDETAIL
To display the FRMDETAIL form when the user chooses an employee from the list of employees on WRKEMP and then selects the Details option from the Employee menu, this statement is added to the Click event of the Details menu item (MDETAILS) in WRKEMP:
EVTROUTINE HANDLING(#MDetails.Click)
SET COM(#frmdetail) formowner(#com_owner)
invoke #frmdetail.ShowForm
ENDROUTINE
The ShowForm method displays the nominated form and makes it the active window on the desktop.
Note that before showing the member form it is good practice to always expressly set its owner form using the run-time FORMOWNER property. This is because the first form that executes in an application becomes the owner of all member forms in the application by default, regardless of the basic structure of the application. In complex applications not setting the owner form may cause unpredictable results.
4b. Setting the Employee Property
We also wanted to set the value of the Employee property of FRMDETAIL as soon as it is displayed. Therefore we added the SET statement in the Click event of the Details menu item as well:
EVTROUTINE HANDLING(#MDetails.Click)
SET COM(#frmdetail) formowner(#com_owner)
invoke #frmdetail.ShowForm
set com(#frmdetail) employee(#empno)
ENDROUTINE
So now the current employee number is passed from WRKEMP to FRMDETAIL.
Even though we did not do this in the sample application, we could have set the value of the Employee property like this:
set com(#frmdetail) employee('A0070')
And we could also have retrieved the value of Employee like this:
CHANGE FIELD(#EMPNO) TO(#FRMDETAIL.Employee)
4c. Getting the Details for the Current Employee
In addition to setting the value of the Employee property, we also wanted to instruct FRMDETAIL to fetch the details of the current employee. Again we added the statement in the Click event of the Details menu item:
EVTROUTINE HANDLING(#MDetails.Click)
SET COM(#frmdetail) formowner(#com_owner)
invoke #frmdetail.ShowForm
set com(#frmdetail) employee(#empno)
invoke #frmdetail.GetInfo
ENDROUTINE
4d. Reacting to the OKPressed Event
To refresh the list of employees on WRKEMP when the OK button is pressed on FRMDETAIL, we created an event routine to monitor the OKPressed event:
EVTROUTINE HANDLING(#frmdetail.OKPressed)
execute GetList
ENDROUTINE
So now the GetList subroutine is executed on WRKEMP every time the OK button is pressed in FRMDETAIL.
You may want to have a look at the 6.19.7 Source Code for the Multi-Form Example Forms .
A Thing to Note about Methods
Before we finish the example, it is worth noting that a form can invoke its own methods. Therefore we chose to put the CloseForm method of FRMDETAIL in the click event of its OK and Cancel buttons:
EVTROUTINE HANDLING(#CANCELBTN.Click)
invoke #frmdetail.Closeform
ENDROUTINE
EVTROUTINE HANDLING(#OKBTN.Click)
UPDATE FIELDS(#DETFLDS) IN_FILE(PSLMST) WITH_KEY(#EMPNO) ISSUE_MSG(*YES)
invoke #frmdetail.Closeform
signal event(OKPressed)
ENDROUTINE
We could, of course, have invoked the method from WRKEMP, but in that case we would have had to create an event to signal that the Cancel button had been clicked.
Compiling the Forms
The application was now complete. We saved both forms and then compiled them. We first saved and compiled FRMDETAIL so that its custom-defined properties became known. We then compiled WRKEMP.
Alternative Implementations
We could have implemented the sample application in a slightly different way as well:
- The GetInfo method could have been modified to pass a value. In this case there would have been no need to define an Employee property for FRMDETAIL.
However, it is customary to define data as properties and actions as methods although in some cases the distinction is not clear-cut. Also, once a property has been defined, its value can also be queried by another form. - It wasn't absolutely necessary to create the OKPressed event because we could have refreshed the list of employees in WRKEMP when FRMDETAIL was closed (Closing event). The drawback in this implementation is that the list would have been refreshed also when FRMDETAIL was closed using the Cancel button.