Terminal Assignment Diagrams
Terminal Assignment Diagrams
The automatic establishment of terminal assignment diagrams will help you with the clear wiring of external switches, sensors and state indicators outside the control cabinet with the relays and switches inside. FluidSIM automatically and appropriately numbers the terminals in the electrical part of the circuit as soon as you place the component “terminal assignment diagram” in the circuit.Using Options- Terminal Assignment Diagram... you may define several presettings:

- Optimize
You may choose either a better overview or a reduced number of terminals for an optimization goal. - Wire
up
Please choose whether FluidSIM is to commit to the logical order when numbering the terminals or, if possible, whether it is to privilege bridges, even if this causes to disturb the strict order of numbering. - Terminal
Designation
Defines which convention will rule the designation of the terminals in the electrical circuit.
 Please leave
plenty of space in the electrical circuit between the components
and towards the voltage supply paths to give enough room for the
automatically inserted terminal connections as well as their
designation to be seen.
Please leave
plenty of space in the electrical circuit between the components
and towards the voltage supply paths to give enough room for the
automatically inserted terminal connections as well as their
designation to be seen.
FluidSIM starts a new terminal strip for each partial circuit that provides no connection with other electrical circuits. These are numbered by “X1”, “X2”, “X3”, etc. Each terminal allocation list may either show all terminal strips or a single one. In order to do this please open the status dialog of the terminal allocation list by double-clicking it:
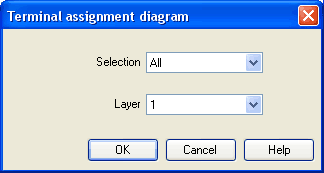
- Selection
Defines for which electrical partial circuit the allocation will be listed in this table. - Layer
In this selection list you will select the drawing layer of the diagram. The drawing layer may be set by clicking on the downward arrow on the right-hand side of the list and choosing a layer.
Depending on the setting of the drawing layers, the rectangle may happen to be non-displayed or to be non-editable. To make the object visible or to change the settings, you need to temporarily activate the drawing layer in the menu View- Layers....