Step 2. Create the PDF XML Template
INT013 - Create PDF Output using PDFDocumentService
1. Open Integrator Studio.
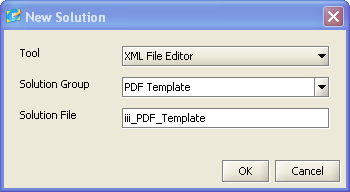
2. Open the iii Training project. Create a new .
3. In the group, create a , using the . Create a solution file iii_PDF_Template.xml, where iii=your initials.
4. Copy and paste the XML code from INT013 - Appendix A, to replace the code in your new XML file. Save your changes.
The supplied XML template is incomplete. You will complete the template by adding elements for employee details and the skills list.
5. Review the contents of the template.
- The PDF document template is defined within <document></document> tags.
- The page size is defined as A4. Other attributes are defined at document level. The orientation is defined as landscape.
- The template contains a number of <content></content> tags. The application program ADDs CONTENT() to these areas using the PDFDocumentService.
- Styles are defined at the end of the XML document within <style ………. /> tags.
- Elements within the template refer to these styles. For example:
<text x1="66" y1="70" width="150" height="15" style="footer" border="" align="left" leading="" value="{STD_NAME}"/>
6. Locate this line: <content name="HEADER"> in the template:
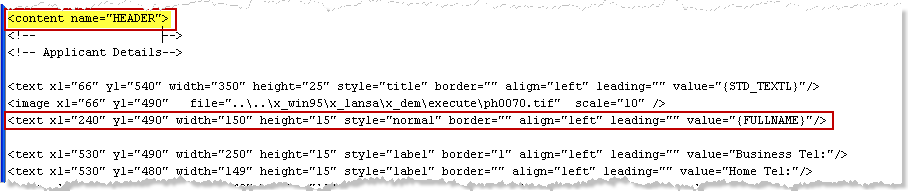
The x1 and y1 values in each element define the top left position for that element on the page, measured from the bottom left corner of the page. Y1 is the vertical component.
a. Add four text elements below FULLNAME with the same left hand location (x1="240") and with y1= a value 10pts below the existing FULLNAME line.
a. Add entries for fields ADDRESS1, ADDRESS2, ADDRESS3 and POSTCODE. To do this, copy the FULLNAME line and then modify it.
Your new code should look like the following:
<text x1="240" y1="480" width="150" height="15" style="normal" border="" align="left" leading="" value="{ADDRESS1}"/>
<text x1="240" y1="470" width="150" height="15" style="normal" border="" align="left" leading="" value="{ADDRESS2}"/>
<text x1="240" y1="460" width="150" height="15" style="normal" border="" align="left" leading="" value="{ADDRESS3}"/>
<text x1="240" y1="450" width="150" height="15" style="normal" border="" align="left" leading="" value="{POSTCODE}"/>
7. Save your changes.
8. Locate the following position in the template:

This defines a table that will be populated from a working list of employee skills.
9. To complete the skills table:
a. Add entries for STS_TEXT (Date Acquired) and COMMENT. Copy and paste from the entry for GRADEDES to create two new lines and then modify their content.
b. Change width-percentage to 30 and change title as well as the field value.
Your completed new code should look like the following:
<column field="STD_TEXT" width-percentage ="30" vertical-align="center" horizontal-align="left" title-horizontal-align="left" title-border="false" title-style="table" title="DATE ACQUIRED" />
<column field="COMMENT" width-percentage ="30" vertical-align="center" horizontal-align="left" title-horizontal-align="left" title-border="false" title-style="table" title="COMMENT" />
10.Save your changes.
11.Review the content for FOOTER1. Note that this will require STD_NAME (current date) and REP1PAGE field values.
12.Note that the FOOTER1 content includes:
<page orientation="landscape"/>
When the FOOTER1 content is added, a new page will be added, with orientation="landscape".
13.If you will be running this exercise on your IBM i server, locate the following line:
<image x1="710" y1="540" file="..\..\webserver\images\lanlogo.gif" scale="100" />
Replace it with:
<image x1="710" y1="540" file="training/lanlogo.gif" scale="100" />
Locate the line:
<image x1="66" y1="490" file="..\..\x_win95\x_lansa\x_dem\execute\ph0070.tif" scale="10" />
Replace it with:
<image x1="66" y1="490" file="training/ph0070.tif" scale="10" />
14.Save your changes and exit the XML Editor
15.With your project open in Integrator Studio, open the server that you are using. This could be localhost, if you are using Integrator installed and licensed on your PC, or it could be the IBM i server used for training.
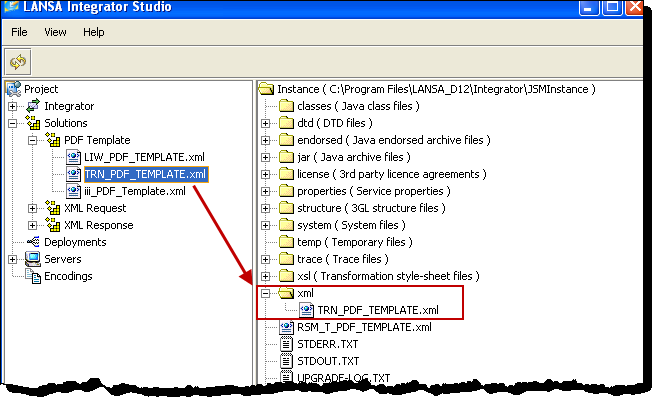
16.Create an XML folder (directory) in the server instance. Note that the folder may already exist. Drag and drop (copy) your iii_PDF_Template.xml to the server.
17.You now have a PDF XML Template ready to use, and you can write the RDMLX function to produce the PDF document.