Step 2. Displaying Tree View Data.
VFW060 – Using a Tree View
In this step you will make design changes to the form, so that it will be able to display data for each level when a tree item is selected.
To achieve this, a number of issues must be addressed:
- Each level in the tree must contain key fields which will enable the additional data to be read from a file. You will add hidden columns to the tree view for each level.
- The form must be able to display either department, section or employee details. A and components will be added to the form to display the data for each level.
- Your 'display details' logic must know which level in the tree was selected
- Additional fields must be populated when the tree is built.
1. Open your form in the view and add the field DEPTMENT to the tree. Initially the tree will show this as a fourth level. Change its property to 1. Change its property to false.
2. Add field SECTION to the tree view. Changes its property to 2 and to false.
3. Add EMPNO to the tree view. Change its to 3 and to false.
4. Save your changes.
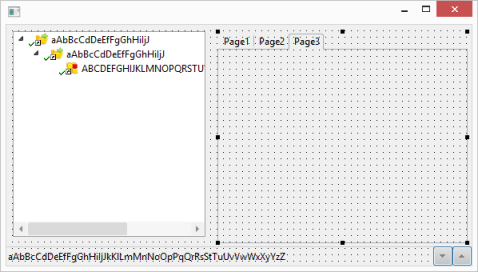
5. Expand the width of the form and add a component to the right hand side and resize it.
Hint: If you want to move the tab folder, click on the area to the right of the tabs, to select the tab folder component and then drag it.
6. Right click on the and use the context menu to . This will add a third tab sheet component inside the . Change its to Sheet_3.
You now need to be aware that there are components at two levels. The is a container. The is the of the .
a. Right click on the background area (just to the right of the "Page 1" tab and use the context menu to .
b. Add a third page (or tab sheet).
Your design should look like the following:
7. Select the Page 1 tab and then click in the center to select the tab sheet itself (Sheet_1). Change its to Department Details.
8. Repeat step 7, to change Sheet_2's to Section Details and Sheet_3's to Employee Details.
9. Save your changes.