Step 4. Create a Real Employees By Location filter
VFW040 – Snap in Real Filters
The filter could quickly be created using the . However, in this step you will create a new filter component by creating much of the code yourself. This will enable you to gain a greater understanding of writing code for the Framework.
1. From the menu click the button select :
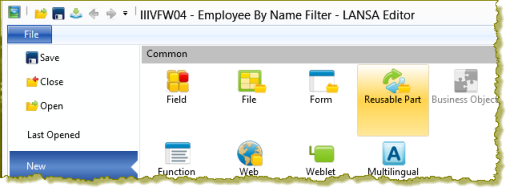
Then select Panel:

3. Create a new Reusable Part / Panel:
iiiVFW05
Employees by Location Filter
Yes
A reusable part is created with an ancestor of PRIM_PANL which means it is a visual component.
4. Select the tab and change the to VF_AC007. This is the filter base class which gives your filter component the properties, events and methods it needs to interact with Framework components.
Your editor must be configured to . Use to change this setting under , if necessary.
5. Paste the source code from VFW040 – Appendix replacing the existing code.
A number of errors will be flagged. Ignore all of these, since you will now complete the code required.
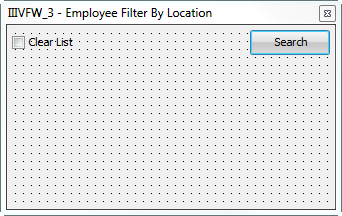
6. Switch to the tab, and resize the panel so that it looks like this:
7. The next step requires the tab to be visible.
a. Select on the ribbon:

b. Select :

The will now be displayed on the left hand side.
8. In the dropdown, select MAIN_LAYOUT.

Note that the BODY_PANEL and BUTTON_PANEL are Children of MAIN_LAYOUT.
The supplied code includes attachment managers and flow managers which define your filter as:
|
Reusable part iiiVFW05 (a panel) |
attachment manager (MAIN_LAYOUT) |
|
BODY_PANEL |
flow down manager (BODY_FLOW) |
|
BUTTON_PANEL |
flow down manager (BUTTON_FLOW) |
9. On the tab, expand and select file SECTAB. Drag and drop fields DEPTMENT and SECTION onto the main panel, below the Clear List checkbox. This is the BODY_PANEL.
10. Select each field and on the tab.
a. Change the property to 100.
b. Reduce the width of each field, which are actually 4 and 3 characters long.
Your filter should look like the following:

Hint: For this type of change, you can select both fields (hold down the Shift Key) and then change to the required value.
11. Switch back to your source code.
a. Complete the Fields() parameter of the Group_by XG_KEYS. Replace < FILE KEYS > with fields DEPTMENT and SECTION.
b. Change the Cond() parameter in the Def_Cond statement. Replace <INPUT FIELD> with field DEPTMENT
Your changed code should look like the following:
Group_By Name(#XG_Keys) Fields(#DEPTMENT #SECTION)
. . .
Def_Cond Name(*SearchOK) Cond(#deptment *ne *Blanks)
Note: The Group_by XG_IDENT is already correctly defined, to retrieve fields EMPNO, SURNAME and GIVENAME.
12. Complete the uSelectData method routine. The supplied source contains a number of comment lines which indicate where you need to add code.
a. Invoke the BeginListUpdate method in the List Manager
#avListmanager.beginListUpdate
b. If the Clear_List ButtonState is checked, invoke the ClearList method in the List Manager:
If ('#Clear_List.ButtonState = Checked')
#avlistmanager.ClearList
Endif
c. Select the Group_by XG_IDENT from logical file PSLMST, with keys in Group_by XG_KEYS, using Generic = *yes and Number of keys = *compute.
Select Fields(#XG_Ident) From_File(pslmst1) With_Key(#XG_Keys) Nbr_Keys(*compute) Generic(*yes)
d. Place the ENDSELECT before the * Indicate that employees instance list updating is complete.
e. Set up work field uf_visid2 as "Surname, Givename"
#uf_visid2 := #surname + ', ' + #givename
f. For each employee selected, invoke the AddtoList method in the List Manager with appropriate parameter values for Visualid1 and Visualid2 and Akey1.
#avlistmanager.addtoList Visualid1(#empno) Visualid2(#uf_visid2) Akey1(#empno)
g. Invoke the EndListUpdate method in the List Manager (after the EndSelect)
#avlistmanager.endListUpdate
Your completed code should now look like the following:
Mthroutine Name(uSelectData)
* Save the current key values from overwrites done by the select loop
Inz_List Named(#Save_Keys)
* Indicate that Employees instance list updating is about to start
#avlistmanager.beginListUpdate
* Clear the current Employees business object instance list
If ('#Clear_List.ButtonState = Checked')
#avlistmanager.clearList
Endif
* Select appropriate instances of Employees
Select Fields(#XG_Ident) From_File(pslmst1) With_Key(#XG_Keys) Nbr_Keys(*compute) Generic(*yes)
* Set up the visual Identifier(s)
#uf_visid2 := #surname + ' ' + #givename
* Add instance details to the instance list
#avlistmanager.AddtoList Visualid1(#empno) Visualid2(#uf_visid2) Akey1(#empno)
Endselect
* Indicate that Employees instance list updating is now complete
#avlistmanager.EndListUpdate
* Restore the saved key values
Get_Entry Number(1) From_List(#Save_Keys)
Endroutine
13. To complete the event handling routine for DEPTMENT.Changed, replace <INPUT FIELD > with #Deptment in this line:
Evtroutine Handling(< INPUT FIELD >.Changed) Options(*NOCLEARMESSAGES *NOCLEARERRORS)
14. Compile your component.
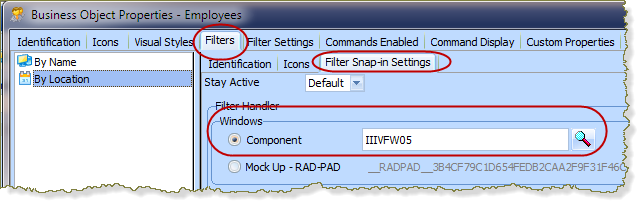
15. In your Framework, open the dialog and select the tab.
16. On the tab, select the tab and snap in the Windows component as iiiVFW05.
17. the Framework and test the filter.
18. Test the filter by specifying a partial department code only (for example, "A") and also with both a department and section specified (for example, ADM and 01).
This filter has a very basic user interface. In a later exercise you will learn how to enhance it.
You will learn more about using in a later exercise.