Step 1. Create Sorted Command Handler
VFW056 – Process a List in Sorted Order
1. Create a new reusable part:
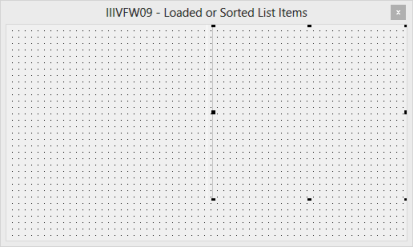
iiiVFW09
Loaded or Sorted List Items
2. Change the component's to VF_AC010.
3. Select the ribbon and give the reusable part an Attachment manager.
4. Drop a panel onto the bottom and changes its name to BUTTON_PANL
5. Drop a Panel onto the centre and change its name to MAIN_PANL.
If necessary, select IIIVFW09 in the tab and ensure the Child Details are correctly defined.
6. Select the MAIN_PANL. On the ribbon, select on the menu to give the panel a .
7. Use the to change the Raised.
The creates two new panels. Rename these as MAIN_LEFT and MAIN_RIGHT as follows:
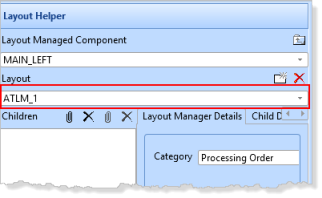
8. Select panel MAIN_LEFT, and on the tab give it an attachment manager of ATLM_1. Do this by selecting the attachment manager ATLM_1 in the .
9. Give the MAIN_RIGHT panel the ATLM_1 attachment manager.
10. Drop a list view into the center of MAIN_LEFT and rename the list view LIST_1.
11. Drop a list view into the center of the MAIN_RIGHT panel and rename the list view LIST_2.
12. Save your changes.
13. Select the file PSLMST on the tab and drag fields EMPNO, SURNAME, GIVENAME, DEPTMENT and SECTION into each list view. In a real application you would spend some time making the column headings suitable.
14. Select list view LIST_1 and select each column. Do this by clicking on each column heading and changing the column's property to True.
15. Create an event routine for LIST_1 and add code to populate it with all records from the file PSLMST. Your code should look like the following:
Evtroutine Handling(#LIST_1.Initialize) Options(*NOCLEARMESSAGES *NOCLEARERRORS)
Clr_List Named(#LIST_1)
Select Fields(#LIST_1) From_File(pslmst)
Add_Entry To_List(#LIST_1)
Endselect
Endroutine
16. In the , select the BUTTON_PANL and give it a . On the tab, select and use the All setting to set all to 6 pixels.
17. Add a push button to the BUTTON_PANL and change its name to PHBN_LOADED.
a. Change its to Loaded Order.
b. Create a event routine.
18. Add a second push button to the BUTTON_PANL.
a. Change its to PHBN_SORTED.
b. Change its to Sorted Order
c. Create a event routine.
19. Save your changes.