Step 3 Define Filters and Command Handlers for Employees
From VLF Windows Application Development
Step 3. Define Filters and Command Handlers for Employees
VFW030 – Create a Prototype
In this step you will define two filters for Employees and make a few basic enhancements to the prototype application.
1. Open the dialog for Employees.
To do this, select the Employees business object on the panel and use the context menu (that is, the right mouse menu) to select the dialog.
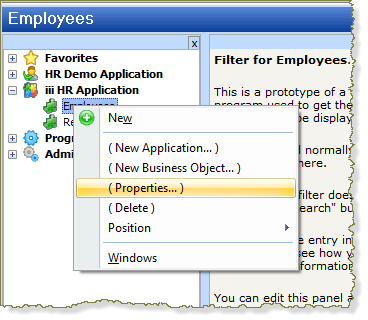
Alternatively, the dialog will open if you double click on the business object in the panel.
The dialog consists of a number of tab sheets which enable you to define and refine your application design. The Framework contains literally thousands of features which you enable or disable or refine, using one of these property tab sheets.
2. On the tab, change the to III_EMPLOYEES. A business object named EMPLOYEES already exists because it is part of the shipped demonstration applications.
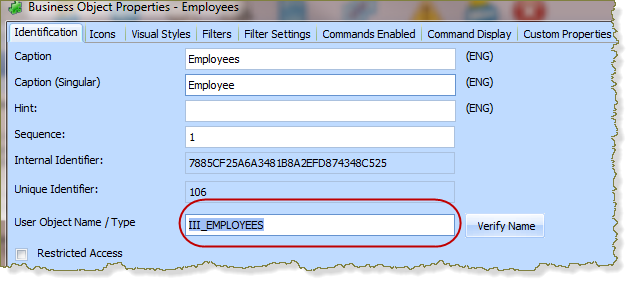
Note: The button will check whether your is unique within the framework. That is, not already used for an existing business object.
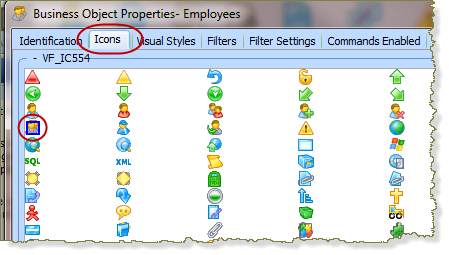
3. Select the tab sheet and select any suitable icon for the Employees business object.
4. Select the tab sheet. This tab enables you to define one or more filter which may be used with this business object. The tab sheet itself contains three more tab sheets.
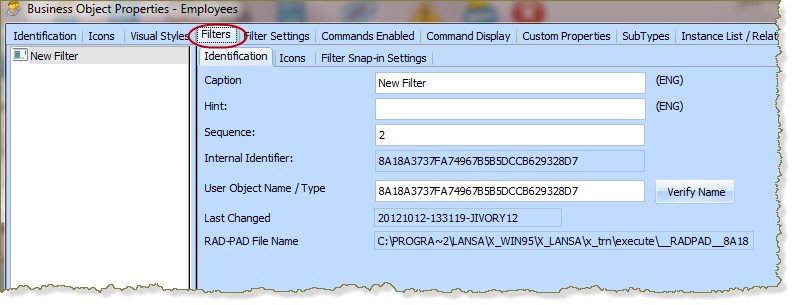
a. The creates one filter for each business object. Change the for the default filter (New Filter) to By Name.
b. Select the tab and select any suitable icon for the By Name filter.
5. Add a new filter by clicking the button.
a. Change the new filter's to By Location.
b. Select the tab sheet and give the filter any suitable icon.
6. You will now refine the definitions for the Employees business object.
Select the tab sheet. Note that its column contains the actions you defined in the .
a. Select the command in the column.
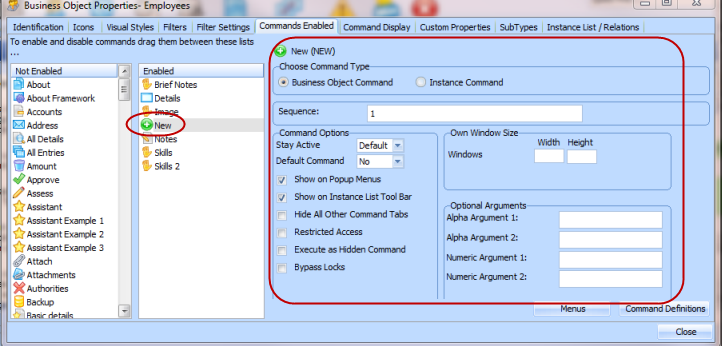
The information shown on the right hand side now contains the definition of the command, as it will be used for the Employees business object.
Notice that in the group box, the is selected. This is because the command does not depend on selection from the instance list.
Using the command would usually add a new entry to the instance list.
7. You will now specify how business object commands are displayed.
Select the tab sheet.
The property defines how business object commands are displayed.
a. Select Separate Stay on Top Window from the drop down.
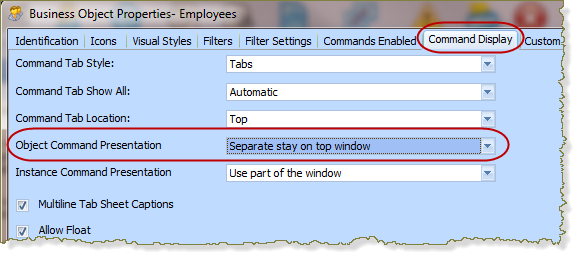
b. Click on the dialog which will appear.
You will make further changes before you Save and Restart the Framework.
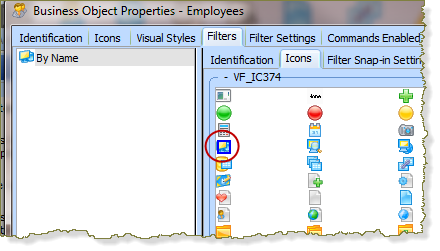
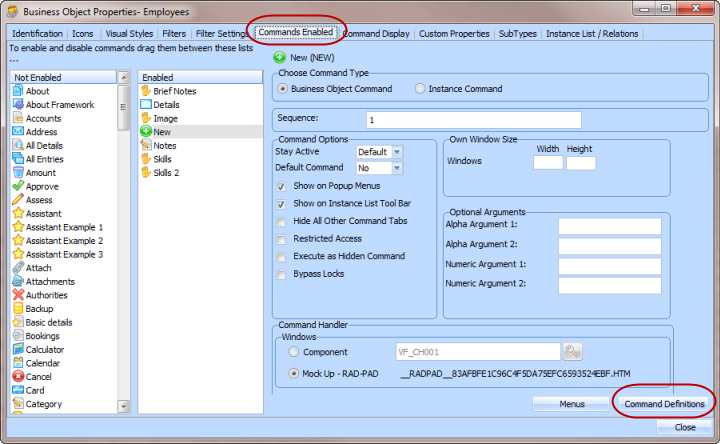
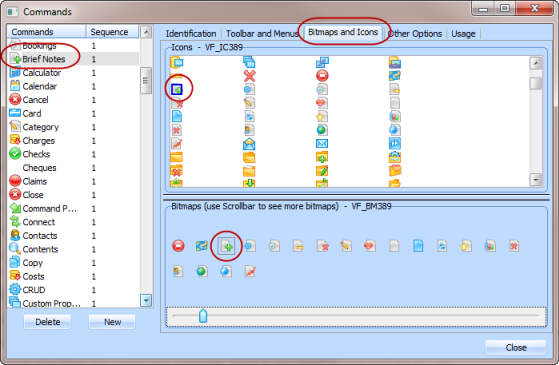
8. Click on the tab sheet and click the button. Review the icons shown against each of the commands. You may find that some of your commands share the same icon. To change a command's icon, do the following:
a. Click the button (bottom right).
b. Select the required command in the list on the left hand side.
c. Select the tab sheets and select a suitable icon. The change is saved automatically.
d. Use the Scrollbar on the panel to select the same bitmap. This will ensure the instance list toolbar contains the same image as the command handler tab sheet.
Note: Do not spend time changing Icons and Bitmaps for all your Employee Commands. These could be changed at any time during development.
Hint: Clicking on the slider and using the cursor keys to scroll through the bitmaps provides more control than dragging the mouse.
9. Close the dialog. the Framework.
10. When the Framework has re-started, select your iii HR Application, followed by the Employees business object.
11. Confirm that Employees now has two filters.
a. Click the button and select an Employee.
b. Notice that the toolbar above the instance list contains your command handler icons.
c. Notice that all your instance list command handlers have a tab sheet at the bottom of the Framework, with the appropriate icon.
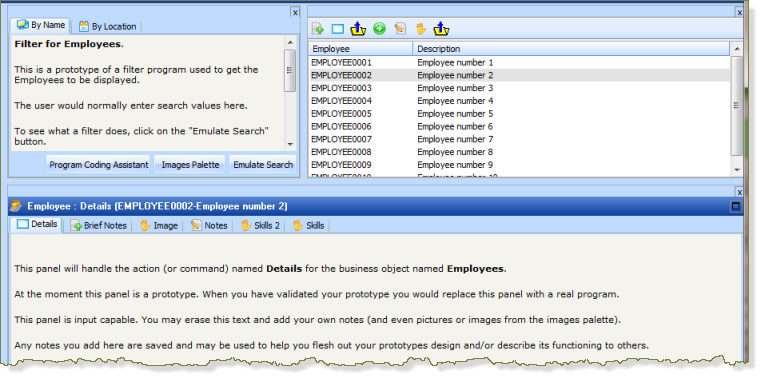
12. Click in one of your Employee filter panels. Notice that these can be edited. The prototype panel is an HTML line editor. When adding text or images, use the key to move to a new line.
a. Delete the existing text, add suitable text.
b. Click on the button to display a dialog which enables images to be drag and dropped onto the filter panel.
- Your objective is to make each panel "realistic" so that the prototype can be reviewed with and end user.
- Restrict your changes to one panel. In a real project you would enhance the appearance of every filter and command handler panel.
13. the Framework.
14. Open the dialog. Select the tab sheet.
A grid defines how the instance list columns are used and displayed. The third column defines the column heading for columns shown in the instance list.
15. Change the to Number and Full Name.
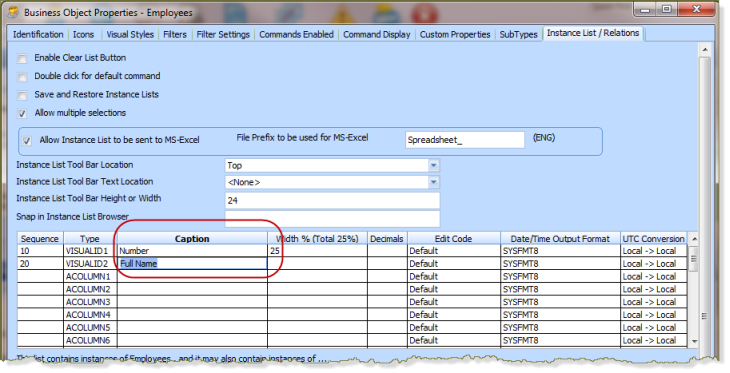
Note: The columns to be displayed are defined by giving them a Sequence number.
In your own application you would probably enable additional columns. Your filters must then be changed to populate the additional columns.
16. Close the dialog.