IMAQ WindToolsSetup VI
Owning Palette: External DisplayInstalled With: NI Vision Development ModuleConfigures the appearance and availability of the region tools found in the NI Vision Tools palette. With no input connections, the palette displays all nine region tools. The NI Vision Tools palette is a floating palette and is always visible.
 |
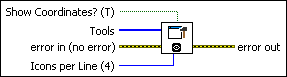
Show Coordinates? (T) specifies whether to show the active pixel coordinates. Coordinates are shown (TRUE) by default.
|
||||||||||||||||||||||||||
 |
Tools is an array of tools specifying which tools are available. The following tools are available:
|
||||||||||||||||||||||||||
 |
error in (no error) describes the error status before this VI or function runs. The default is no error. If an error occurred before this VI or function runs, the VI or function passes the error in value to error out. This VI or function runs normally only if no error occurred before this VI or function runs. If an error occurs while this VI or function runs, it runs normally and sets its own error status in error out. Use the Simple Error Handler or General Error Handler VIs to display the description of the error code. Use error in and error out to check errors and to specify execution order by wiring error out from one node to error in of the next node.
|
||||||||||||||||||||||||||
 |
Icons per Line (4) determines the number of icons per line. The subsequent lines are set as a function of the number of remaining available icons.
|
||||||||||||||||||||||||||
 |
error out contains error information. If error in indicates that an error occurred before this VI or function ran, error out contains the same error information. Otherwise, it describes the error status that this VI or function produces. Right-click the error out indicator on the front panel and select Explain Error from the shortcut menu for more information about the error.
|


Details
Use the IMAQ WindLastEvent VI to retrieve the draw events on the window and find the coordinates of a selected region.
You can alter the functionality of region tools by using a tool while pressing certain keyboard keys, as follows:
- <Shift> while drawing constrains x and y dimensions of an ROI to be the same. This forces rectangles into squares, ellipses into circles, and line segments into horizontal or vertical segments. You can also use it to constrain the rotation of the rotated rectangles and annuluses to multiples of 45 degrees.
- <Control> <Click> adds an ROI without erasing the previous ROI elements. The previous elements are erased if you do not use <Control> when starting a new element.
- Double-click while drawing produces the last point of a polygon or broken line.
 |
Note You can erase an ROI in an image window by selecting it and pressing <Delete>. |
Use the selection tool to select any currently existing ROI by clicking its border. You can then manipulate the ROI in the following ways:
- To resize a rectangle or ellipse, click in a grab handle and drag it to a new location.
- To reposition a vertex in a broken line, polygon, or line, click in a grab handle and move it to a new location.
- To reposition a rectangle or ellipse, click in the interior and drag it to a new location.
- To reposition a point, click on it and drag it to a new location.
- To reposition lines, broken lines, and polygons, click on any segment and drag it to a new location.
- To reposition freehand lines and freehand regions, click anywhere on the line and drag it to a new location.