IMAQ ROIToMask VI
Owning Palette: Region of InterestInstalled With: NI Vision Development ModuleTransforms a region of interest into a mask.

 |
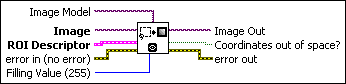
Image Model serves as a template for the destination image where the mask is placed. This can be any image type that NI Vision supports. Image takes the characteristics of Image Model (size and location of ROI) when Image Model is connected. However, the connection of Image Model is optional. When no Image Model is connected, the size of the image mask generated is limited to the bounding rectangle of the ROI Descriptor, which reduces the amount of memory used. The offset of the image mask generated |
||||||||||||
|
Image is a reference to the destination image in which the mask is created. |
||||||||||||
 |
ROI Descriptor is the descriptor that defines the region of interest.
|
||||||||||||
 |
error in (no error) describes the error status before this VI or function runs. The default is no error. If an error occurred before this VI or function runs, the VI or function passes the error in value to error out. This VI or function runs normally only if no error occurred before this VI or function runs. If an error occurs while this VI or function runs, it runs normally and sets its own error status in error out. Use the Simple Error Handler or General Error Handler VIs to display the description of the error code. Use error in and error out to check errors and to specify execution order by wiring error out from one node to error in of the next node.
|
||||||||||||
 |
Filling Value (255) is the pixel value of the mask. All pixels inside the region of interest take this value. The default value is 255. |
||||||||||||
 |
Image Out is a reference to the destination image. If Image Dst is connected, Image Dst Out is the same as Image Dst. Otherwise, Image Dst Out refers to the image referenced by Image Src. |
||||||||||||
 |
Coordinates out of space? returns TRUE if any ROI data is found outside the space associated with the Image Model. |
||||||||||||
 |
error out contains error information. If error in indicates that an error occurred before this VI or function ran, error out contains the same error information. Otherwise, it describes the error status that this VI or function produces. Right-click the error out indicator on the front panel and select Explain Error from the shortcut menu for more information about the error.
|


Details
You can use this VI in two ways. The simplest technique is to connect the input Image Model. In this case you can use the source image, in which the image ROI was drawn, as a template for the final destination image by connecting it to Image Model. The output image (Image Out) automatically acquires the size of the image and location of the ROI as found in the original source image.
However, you do not have to connect an Image Model. In this case, the ROI requires an offset that is determined automatically from the upper-left corner of the bounding rectangle described by the ROI. These offset values are automatically set to the image mask.
Examples
Refer to the following for an example that uses this VI.
- LabVIEW\examples\Vision\2. Functions\Analysis\Histogram Example.vi