Traces, Channels, and Windows on the Analyzer
It is critical to understand the meaning of the following terms as they are used on the analyzer.
Traces
Traces are a series of measured data points. There is no theoretical limit to the number of traces. However, the practical limit is the maximum number of windows times the maximum number of traces per window (24).
In addition, one memory trace can be stored and displayed for every data trace. Learn more about Math / Memory traces.
Trace settings affect the presentation and mathematical operations of the measured data.
The following are Trace settings:
Time Domain (Opt 010)
Managing Traces
How to display a custom trace title (separate topic)
How to display a wide active trace (separate topic)
How to Select a TraceA trace must be selected (active) before its trace settings can be changed. |
|
Using front-panel hardkey [softkey] buttons |
Using Menus |
|
|
|
|

How to Delete a Trace |
|
Using front-panel |
Using Menus |
|
|
|
|
How to Move a trace to a different windowYou can DRAG a trace from one window to another, or... |
|
Using front-panel |
Using Menus |
|
|
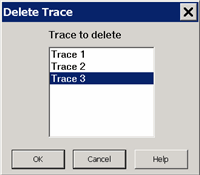
This dialog is launched by clicking Trace/Chan, then Trace, then Delete Trace The Select Trace dialog is launched by clicking Trace/Chan, then Trace, then Select Trace
Both the Select Trace and Delete Trace dialogs work the same. Select a trace, then click OK. Only ONE trace can be Selected or Deleted. Note: To EASILY select a trace, click the Trace Status label. To EASILY delete a trace, right-click the Trace Status label, then click Delete. |
Trace Max
Makes the active trace the ONLY trace on the display. All other traces are hidden.
How to do Trace Max
Select Trace, then Trace Max.
With Trace Max ON, select a different trace from the Traces softkeys to make that trace visible.
To make all traces visible again select Trace Max OFF
Trace Hold
With Trace Hold (Max or Min) enabled, each data point is updated ONLY when the current data point measurement exceeds the highest (for Max) or lowest (for Min) currently-stored data point.
How to hold the active trace at the maximum or minimum points. |
|
Using front-panel
|
Using Menus Not available |
|
|
Maximum/Minimum trace hold can be applied with several conditions:
Feature is applicable to any data trace, but NOT to memory traces.
When the stimulus or any data post processing setting is changed, the trace hold data will be reset. These settings include: Smoothing, Gating, Time Domain Transform, Conversion, Data Math, Equation Editor, Parameter change, Formatting change.
Minimum/maximum comparison is done with formatted data. For Smith and Polar formats, absolute data is used and not phase.
Trace hold data can be recalled.
Data save files formats
SnP does NOT save trace hold data
Citifile, CSV, MDF, PRN DOES save trace hold data
Channels
Channels contain traces. The analyzer can have up to 200 independent channels.
Channel settings determine how the trace data is measured . All traces that are assigned to a channel share the same channel settings. A channel must be selected (active) to modify its settings. To select a channel, click the Trace Status button of a Trace in that channel. The following are channel settings:
Trigger (some settings are global)
Managing Channels
|
A channel must be selected (active) before its settings can be changed. To make a channel active, select a trace in that channel. |
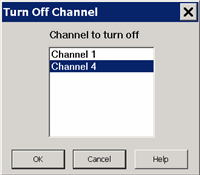
How to Turn ON or OFF a Channel
Click Trace/Chan, then Channel, then Turn On / Off Channel.
Both the Turn ON and Turn OFF dialogs work the same. Select a channel, then click OK. Only ONE channel can be selected When turning ON a channel, the new channel is always the Standard Measurement Class with an S11 trace. Note: To create more than one trace in a new channel, click Trace, then New Trace |
Windows
Windows are used for viewing traces.
The analyzer can show an UNLIMITED number of windows on the screen with the following limitations:
The SCPI status register can track the status of up to 576 traces.
Each window can contain up to 24 traces.
Windows are completely independent of channels.
Learn to create and manage windows.
See Customize the analyzer screen to learn how to make other window settings.
The following is a window containing two traces. Both traces use the same channel 1 settings as indicated by the annotation at the bottom of the window.
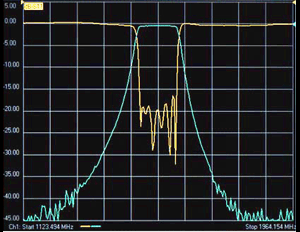
The window number shows in the lower-left corner of the window. The following shows window 5.

Managing Windows
How to make various window settingsNew, Close, Tile, Cascade, Minimize, Maximize |
|
Using front-panel |
Using Menus |
|
|
|
|
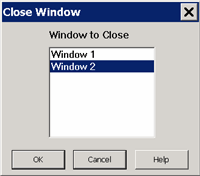
Select a window, then click OK. The remaining windows are tiled. Only ONE window can be selected. Traces contained in a closed window are deleted. Note: To EASILY close a window, right-click in the window (away from a trace) then select Close Window. See Customize the analyzer screen to learn how to make other window settings. |