Print a Displayed Measurement
The analyzer allows you to print a displayed measurement to a printer or to a file. The printer can be either networked or local.
You can connect a printer to one of the PNA USB ports or to the LAN connector.
To Add a Printer
Note: If you try to print from the PNA application and the Add Printer Wizard appears, click Cancel and add the printer using the following procedure.
-
From the PNA application, click View then click Minimize Application
-
On the Windows taskbar, click Start, point to Settings, then click Printers.
-
Double-click Add Printer.
-
Follow the instructions in the Add Printer Wizard.
For more information, refer to Microsoft Windows Help or your printer documentation.
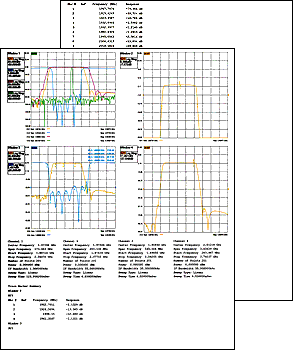
The measurement information on the screen can be printed to any local or networked printer that is connected to the PNA. The graphic below shows an example of how a screen-capture image appears when printed. The Page Setup settings allows you to customize the printed form of the measurement information.
How to Print a Hardcopy |
|
|
Using front-panel hardkey [softkey] buttons |
Using Menus |
|
|
|
No programming commands are available for this feature. |
|
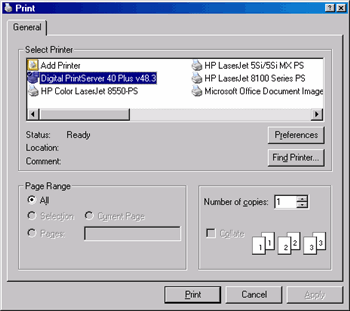
Note: For information on the choices in the Print dialog box, see Windows Help.
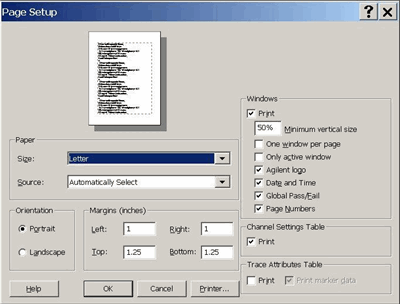
The Page Setup dialog allows flexibility in the appearance that measurement data is printed. After setting up the page, click File, then Print... to obtain a hard-copy.
How to select Page Setup |
|
|
Using front-panel |
Using Menus |
|
|
|
|
|

|
Paper, Orientation, and Margins These settings do NOT survive a PNA shutdown. See Windows Help for information on these settings. WindowsThe following PNA-specific settings DO survive a PNA shutdown: Minimum vertical size Adjust to change the amount of a page that the measurement window fills. The adjustment range is from 40 to 100%. One window per page Check to print one window per page. Clear to print all selected windows without a forced page break. Only active window Check to print only the active window. Clear to print all windows. Keysight logo Check to print the Keysight logo to the header. Data and Time Check to add the current date and time to the header. Global Pass/Fail Check to add the Global Pass/Fail status to the header. Page Numbers Check to add page numbers (1 of n) to the header. Channel Settings TablePrint Check to print the channel settings table. Segment data can no longer be printed. Trace Attributes TablePrint Check to print the Trace Attributes Table. The Trace Attributes are measurement type, correction factors ON or OFF, smoothing, options, and marker details. The Trace Attributes are listed by Trace ID# for each window. Each Trace ID# can have multiple entries depending on the number of markers associated with the trace. The marker details are marker number, position and response. If there are multiple markers on a trace, the trace attributes are only shown for the first marker. However, the trace attributes for the first marker apply to all other markers on that trace. The options column can have one or more options. D for Delay, M for Marker, G for Gating. Multiple options selected would appear as follows: DMG. Print marker data Check to print all marker data. The amount of data depends on how many markers are created. |
The analyzer can save a screen-capture image in any of the following formats:
-
.png (preferred format)
-
.bmp (bitmap)
-
.jpg
The analyzer automatically saves the file to the current path. If not previously defined, the analyzer automatically selects the default path c:\users\public\network analyzer\documents.
A .bmp file, like a .prn file, can be imported into software applications such as Microsoft Excel, Word, or Paint to display a screen-capture image.
See Save and Recall files for more information.
How to Print to a File |
|
|
Using front-panel |
Using Menus |
|
|
|
|
|
Last modified:
|
25-Nov-2013 |
Default folder for Win7 |
|
13-Apr-2011 |
Removed segment data checkbox |
|
3-Sep-2008 |
Removed legacy content |
|
23-Apr-2008 |
Added preference survive note. |
|
10/19/06 |
Modified for new print dialog |