


There are various ways that you can share the maps you create with other users, depending on whether the other person has AutoCAD Map 3D and has access to the source data store.
- Case 1: The other person has AutoCAD Map 3D and has the same access to the source data that you do—Share styles by saving layers to .layer files. (The recipient may need to reset the path to the source data.)
- Case 2: The other person has AutoCAD Map 3D but does not have access to the source data—Share the data by saving as SDF (see Exchange data with other users by exporting to SDF format). The data needs to be restyled.
- Case
3: The other person does not have AutoCAD Map 3D and does not have
access to the source data—Export the map to DWG (see
Export the current map to DWG format with visual fidelity). The features in the map are converted to DWG objects and styles are converted. The map can be viewed in AutoCAD with good visual fidelity.
Case 1 is the best in terms of the time needed to rebuild the map. Layers are saved to .layer files, which can then be dragged into an empty map or into a map that already has some layers in it. This is a good way to enforce common styles within a workgroup. The .layer file records the styling for the features and also records the path to the source data. If everyone in the workgroup has the same drive mappings to the data store, then the transfer of .layer files will work seamlessly. If you send a .layer file to someone who has different drive mappings, then he or she will have to paste in the correct path (this is very easy to do in the Data Connect dialog box).
The illustration below shows three layers: for roads, storm drains, and drainage inlets. Engineer A has been working on these layers and now wants to pass them on to Engineer B. He saves them as three separate .layer files.

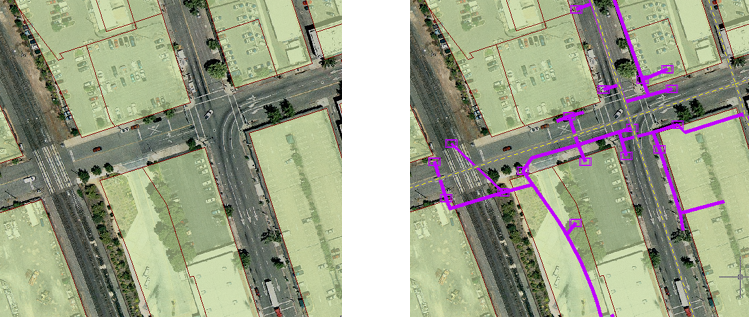
Engineer B has been working on the parcels in conjunction with an aerial photograph of the properties in the neighborhood, as shown in the view on the left below. She receives the .layer files from Engineer A and drags them into the map. The result is shown in the view on the right. The process is extremely quick and easy.
The first animation shows how to save a layer for sharing with other users of AutoCAD Map 3D. A .layer file stores the styling and path information for a single layer, so you need to save them one at a time.
Show me how to save a layer to a .layer file
The second animation shows how to use .layer files to build a map by dragging them from Windows Explorer. You can drag the files singly or you can drag several at the same time, as demonstrated here.