


In an earlier skill, you saw how to edit the ranges of a theme that you have already applied to a layer to get exactly the effect you want (see Manually adjust the ranges of a theme). You can do the same thing with the elevation ranges of a surface. First, you apply a theme using one of the pre-defined color palettes. You then use the Style Editor to modify the elevations individually to control the appearance of the surface.
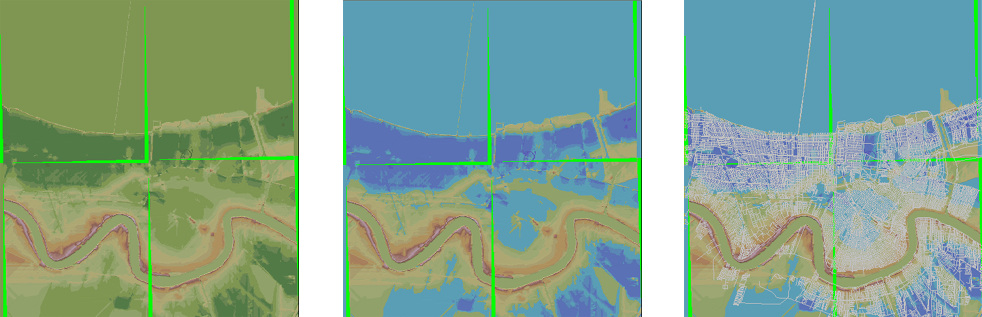
One useful application of this skill is to ensure that bodies of water are rendered with a blue color. When you apply a color palette, the colors are assigned to elevations in an arbitrary way. You can’t guarantee that sea level will be blue, for example. Some palettes which are commonly used to render elevations, such as the USGS (United States Geological Survey) land cover palette used on the left in the illustration below, do not contain any blue colors. You can correct this with a little manual editing.
The illustration below shows three views of a map of the city of New Orleans. The map is one of a series depicting the flooding that occurred in the city following Hurricane Katrina in 2005. The view on the left shows four DEM files which have been brought into the map as a single layer and then themed by elevation. The view in the center shows the elevation ranges after editing. The land at or below sea level is now rendered in shades of blue—the darker the blue, the lower the elevation. The view on the right shows the street network on top of the elevation layer to show which areas of the city are affected.
In the first demonstration, we return to the map we were working with in the previous skill. At that point, we had rendered the surface elevation and adjusted the hillshading to give a realistic effect. The following animation takes over from that point. It demonstrates two techniques: how to delete unwanted ranges, and how to change the color for a particular range.
Why would we want to delete an elevation range? Suppose we know that the area covered by the surface in our map has no pixels with an elevation lower than a certain value. We can determine this, for example, by starting at the lowest elevation and changing the color for each range to something very obvious, like bright yellow or red, and then seeing if any areas of the surface are affected. In this way, we have found out that in our map there are no pixels with an elevation lower than 162. Therefore we can delete those ranges.
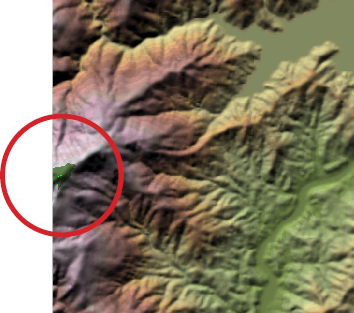
One problem that we have noticed with the surface is that the very highest elevation has been rendered with a green color, whereas it should be white. So we will change the color so that it renders correctly.
Show me how to delete elevation ranges and change the color of a range
The map shows a large lake or reservoir behind a dam. The next thing we want to do is to render the water surface of the lake in blue. A topographic map of the area would typically show the elevation of the lake. However, if we do not have such a map, we can also determine the elevation of the lake using the trial and error method described above. Either way, we know that the elevation of the lake surface is 325. We can now add an elevation range (or rule) specifically for the lake and then make its color blue.