Arrange merge fields in the catalog merge area
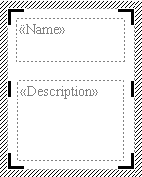
When you insert merge fields into the catalog merge area of your catalog merge template, Microsoft Publisher inserts each field in either a text box or picture frame, depending upon the type of field you insert. Arrange the text boxes or picture frames containing these merge fields in the catalog merge area. When you complete the merge, the catalog merge area will repeat this arrangement on the page, once for each record in your data source. Merge fields that are inserted outside the catalog merge area will not repeat.

- Insert merge fields into the Catalog Merge Area.
- If it is not already active, open your catalog merge template.
- On the Tools menu, point to Mail and Catalog Merge, and then click Insert Field.
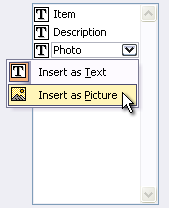
- In the Mail and Catalog Merge task pane (Step 3: Create your catalog merge template), point to the field that you want to insert, click the arrow on the right, and then click Insert as Text or Insert as Picture.

If you select Insert as Text, Publisher inserts a merge field within a text box into the Catalog Merge Area. If you select Insert as Picture, Publisher inserts a merge field within a picture frame into the Catalog Merge Area.
Publisher inserts each merge field within a new text box or picture frame, unless a text box in the catalog merge area is already selected. If a previously inserted text box is selected when you insert a new merge field, the merge field will be inserted into this selected text box.
- Repeat Step 3 until you have inserted all of the fields that you want from your data source.
- Do any of the following:
 Move a text box or picture frame
- Select the text box or picture frame that you want to move.
- Position the mouse pointer over the text box or picture frame until the pointer changes to the Move pointer
 .
. - Drag the text box or picture frame to a new position.
 Resize a text box or picture frame
- Select the text box or picture frame that you want to resize.
- Position the mouse pointer over one of the handles on the text box or picture frame until the pointer changes to the Resize pointer
 .
. - Drag the mouse until the text box or picture frame is the size you want.
 Rotate a text box or picture frame
- Select the text box or picture frame you want to rotate.
- Point to the green rotation handle.
- Drag the mouse in the direction you want the object to rotate.
- Think about the different types of information in your data source when you position or resize the text boxes and picture frames in your catalog merge area. A one word or two word item name might require a smaller text box than a lengthy text description.
- Use layout guides to help you position the text boxes and picture frames evenly in the catalog merge area. To view layout guides, click Boundaries and Guides on the View menu. Set layout guides in the Layout Guides dialog box (Arrange menu, Layout Guides).
