RAMP-TSAD07 Step 5. Defining the Exit Junctions and vHandle_NAVIGATETO scripting
The final thing you need to do is make sure that all three destinations have an Exit Junction specified and that their vHandle_NAVIGATETO functions can navigate to the exit junction when requested.
1. Open RAMP Tools and review the properties of the 3 destination screens UFRTS03_D1, UFRTS03_D2 and UFRTS03_D3.
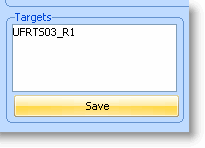
2. In each destination screen, edit the Targets list displayed so that it only contains the name of the junction UFRTS03_R1. Remember to click the save button after making your changes to each Targets list.

Technical Note about Exit Junctions: When a destination screen is on display and a navigation to another screen needs to be performed, the destination screen will be asked to navigate to its exit junction before the navigation route to the target screen is calculated. By default a destination screen’s exit junction is the first junction defined in its Targets list.
3. Now review the script associated with each of the destination screen.
4. Locate its vHandle_NAVIGATETO function and ensure it contains a script that can handle a request to navigate to the junction named UFRTS03_R1.
Your scripts probably contain this code already from the previous tutorial. However, it’s important you understand that you can (and sometimes do) manually edit the Targets list and add the associated implementation logic to the vHandle_NAVIGATETO function.
It their trimmest form, the vHandle_NAVIGATETO functions for all of the destination screens should now look like this:
switch (sToForm)
{
/* <NAVIGATESWITCH> - Do not remove or alter this line */
case "UFRTS03_R1": /* Navigate back to the exit junction */
{
SENDKEY(KeyF12);
Q_CHECK_CURRENT_FORM("UFRTS03_R1","Unable to navigate to form UFRTS03_R1");
}
break;
default: /* Handle an invalid request */
alert("Form " + this.vName + " cannot navigate to form " + sToForm);
bReturn = false;
break;
}