RAMP-TS015 Step 5. Creating a Set of Screens (Advanced)
In this tutorial you will create a set of screens with very similar behavioral characteristics (even though each screen has a different signature) by giving them the same screen name. In this way you will have a single screen definition and script managing them all.
The screens used in this tutorial are the screens accessed from the Code Tables business object in the Personnel application in Framework in RAMP-TS002: Rapidly Modernizing Complete Application Segments:
- Review/Maintain/Print Department Table
- Review/Maintain/Print Section Table
- Review/Maintain/Print Skill Table
You may want to review these screens first.
1. In the RAMP Tools window ensure that the Auto Update Navigation Scripts option is selected.
2. Use the RAMP-TS 5250 emulator to navigate to the Personnel Table Main Menu (PSLTABMain).
3. Select option 1. Review/Maintain/Print Department Table.
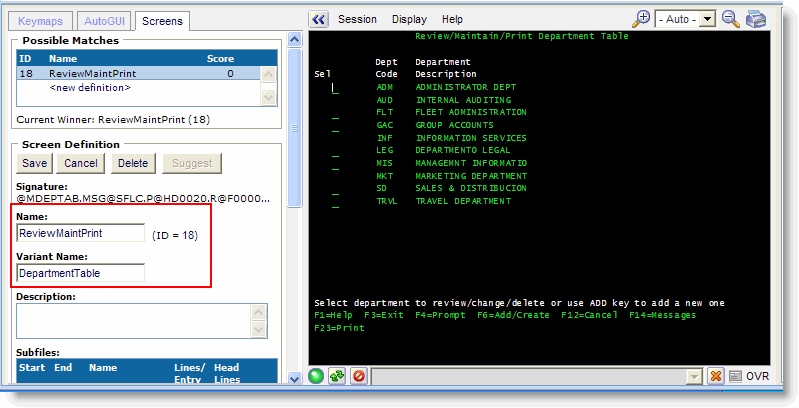
4. Name the Review/Maintain/Print Department Table screen ReviewMaintPrint.
5. Also give it the Variant Name DepartmentTable in case you might want to handle this particular screen in the script. (This is optional, you would normally only give a variant name if you knew you would need it).

6. Save the screen definition and cancel out of the screen.
7. Select option 2. Review/Maintain/Print Section Table
8. Name the screen ReviewMaintPrint.
9. Optionally give it the Variant Name SectionTable.
10. Save the screen definition and cancel back to the main menu.
11. Select option 3. Review/Maintain/Print Skill Table
12. Again name the screen ReviewMaintPrint and optionally give it the Variant Name SkillTable.
13. Save the screen definition.
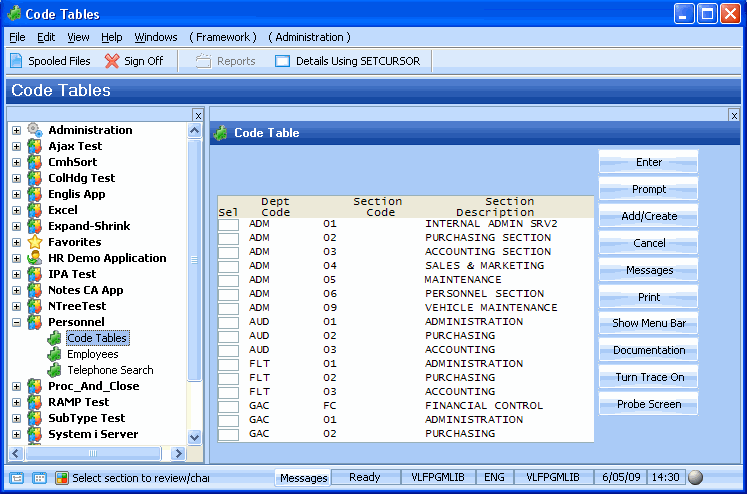
14. Check in the Tracking Info that all the three screens have the same name.
15. Classify the screen as a destination.
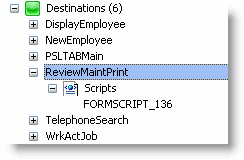
Note that in the Screens and Scripts List there is a single screen definition for ReviewMaintPrint with a single script that controls it:

Because there is a common screen definition, any changes you make to it affects all the three screens.
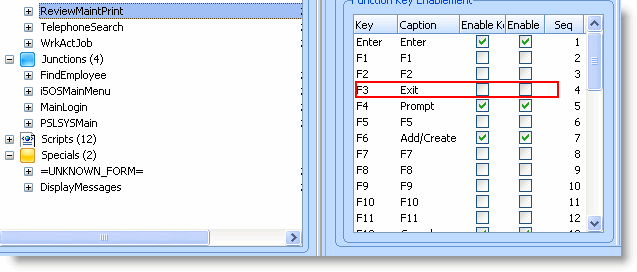
16. Disable the Exit key and button.

17. Do a partial save of the RAMP definition.
18. Restart the Framework.
19. Switch to the Framework window and choose the Code Tables business object created in an earlier tutorial.
20. Select the Review/Maintain/Print options and verify that the Exit key and button are not enabled in any of the three screens:
