RAMP-TS015 Step 3. Creating Screen Variants
In this step you will identify the different views of the Work with Active Jobs screen as variants, so that your script can handle the view being shown.
1. Enter the Variant name Status for the first view.
2. Add the Status column heading to the screen definition.
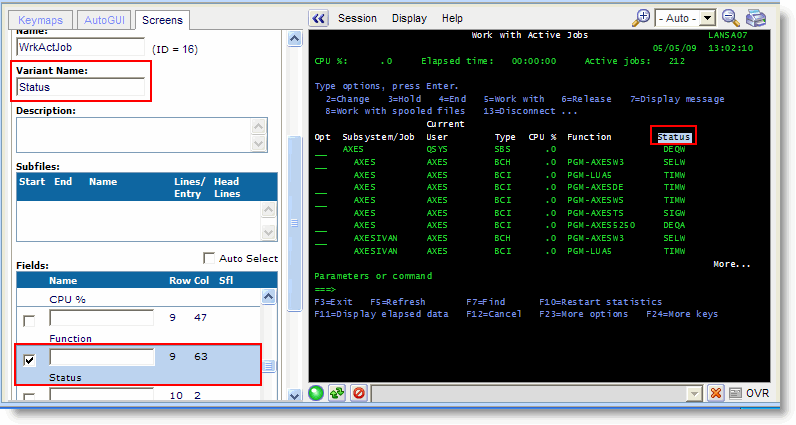
3. Click on the Save button on the tab.
4. Press F11 on the Work with Active jobs screen to display the next view.
5. Add the screen's title and the Elapsed column heading to the screen definition.

6. Enter the name of the screen (WrkActJob) and the Variant name Elapsed.
7. Click on the Save button on the Screens tab.
8. Press F11 on the Work with Active jobs screen to display the next view.
9. Add the Threads column heading to screen definition by checking the field corresponding to the title ---- Threads ----.
10. Enter the Variant name Threads.
11. Click on the Save button on the tab.
12. Press F11 to verify the different views have variant names.
13. Do a partial save of the RAMP definition.
Next you will create an application and business object you can use to snap the Work with Active Jobs screen into the Framework.
14. In the Framework window, use the Instant Prototyping Assistant to create a new application System i Server:
- Create business object Active Jobs
- Associate Active Jobs with a Details command handler
- Create application System i Server
- Add Active Jobs to the new application.
15. Delete the filter for Active Jobs and make Details a business object command.
16. Save and restart the Framework and start RAMP Tools.
17. In the RAMP Tools window associate the WrkActJob screen with the Details command handler of the Active Jobs business object.
18. Disable the Cancel key and button.
19. Select the Session option SESSION_D to execute the destination screen in a separate session.
20. Do a partial save of the RAMP definition.