

combit List & Label
Practice: Payment Form on the Last Page
Let's assume that you want to print a payment form on the last page of a multi-page invoice. The payment form is preprinted on a special paper in paper bin 2 in the lower range of the page. The field contents have to be printed exactly at the correct positions.
Proceed as follows:
1. Open the dialog for the layout regions by Project > Page Setup.
2. Create a new region "Last page". Use the function Lastpage() as a condition that returns the value "True" if the last page is printed. Choose paper bin 2 for this region so the last page will always be printed on the special payment form preprint from paper bin 2.
3. Position the text objects for the field contents of the payment form exactly at the correct position. You can put a scanned-in picture of the payment form in the background by choosing/clicking Objects > Insert > Form Template.
4. Set the appearance condition of all text objects to Lastpage() to make sure they are only printed on the last page.
5. You have to link all text fields with the table as the function Lastpage() can only be evaluated correctly in tables, layout regions or objects linked to tables.
Links are created and edited in the "Object List" dialog. Open this dialog by choosing/clicking Objects > Object List. Select the table object and link via text object of the payment form to it by clicking "Link with...". The interlink type "Sequential" is already selected. The sequential interlink is sufficient here as no changes in object position or object size are desired.
Repeat these steps for all text objects.
6. Now you have to avoid that the fields of the payment form are printed on top of the table if the table ends on the last page in the area of the payment order.
Therefore create a placeholder by inserting a rectangle object without border and filling. The rectangle has the exact height of the payment form and has to overlap the table necessarily! Select the table in the object dialog and link the rectangle to it. Choose "At end, keep size" as interlink type. No matter where the table ends, the rectangle is always output in the selected size after the text. If there is not enough space after the table, the rectangle is output on the next page and a page break is triggered.
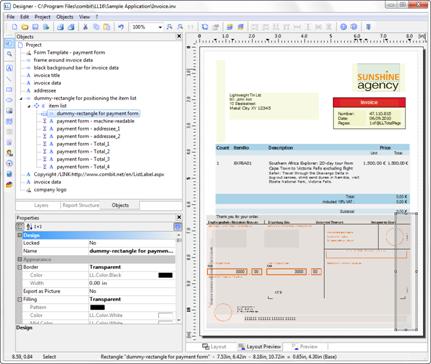
Figure 8.12: Invoice with fields and placeholders for payment order