It's a good idea to add a page number in the lower area of the page. To do this, add a new text object. You will be using functions (such as the page number function) as well as fixed text with this object.
1. In the "Objects" toolbar, choose the "Text" object type.

Figure 2.23: "Objects" toolbar
2. In the workspace, hold down the left mouse button and pull the object to the required size.
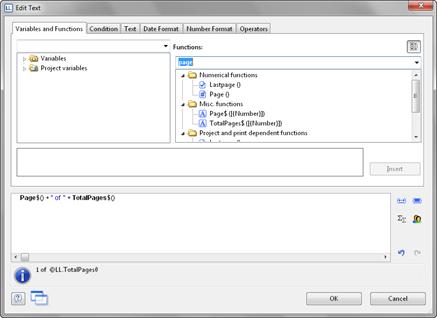
3. The formula wizard will now appear which you can use to define the contents of the text object. The available functions are shown in the right pane. You can use an auto filter with this list. Type "page" in the filter field. This will cause all functions containing the expression "page" to be displayed.
§ The "Page$ ()" function returns the page number.
§ The "TotalPage$ ()" function returns the total number of pages.
Add the "Page$ ()" function to the result area by double-clicking.
4. If you now want to output a footer in the form of "Page 1 of 2", you can enter the text "of" directly in the usual way. Please consider that individual parts must be joined with a "+" and that text must be enclosed in quotation marks.
5. Now add the "TotalPages$ ()" function by double-clicking to get the total number pages. The formula will look like this:

Figure 2.24: Formula wizard with functions and text
6. You can center this line in the report in the usual way:

Figure 2.25: Quick format "centered" alignment
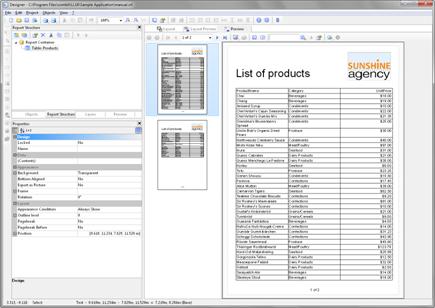
7. Switch to preview mode to view the result:

Figure 2.26: Real data preview in the Designer

