

combit List & Label
Adding Formatted Text for the Letter
You output the text for the letter with the formatted text object. As opposed to the normal text object, this object also lets you change the formatting of the text within a line.
1. In the "Objects" toolbar, choose the "Formatted text" object type.

Figure 4.11: "Objects" toolbar
2. Pull the object to the required size.
3. A dialog appears where you can type in the letter in the form of continuous text.
Alternatively, you can select an RTF variable from the "Source" drop-down list if available.
Expert tip: If the current RTF object is appended to another RTF object for which the "Page break" option is enabled, the "Transfer exceeding text of ..." option is available as a data source ...". If you select this option, you cannot enter text in the RTF object because the (remaining) text will be transferred automatically from the other RTF object (e.g. for a two-column print).
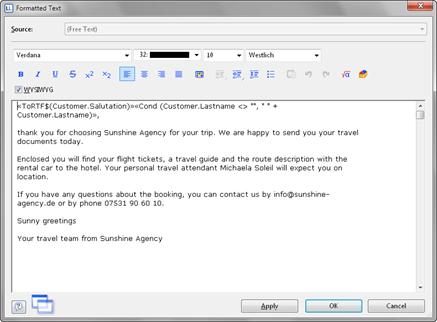
Figure 4.12: Formatted text object dialog
4. If you click the formula button, the formula wizard will appear here as well, which you can use to insert variables.
You want to address the recipient personally so you now create the salutation. When doing so, please make sure that you do not enter an unnecessary space character at the end of the salutation formula if the "Name" field in "Dear Sir or Madam" salutations is to be empty. One possibility for a perfect salutation formula is the use of Rtrim$() e.g.:
«Rtrim$(Recipient.Salutation + " " + Recipient.Lastname)»,
5. Now write the letter text. You have various formatting options at your disposal. You create a tab stop with Ctrl+tab.
Or you can create the letter text or pictures and graphics in your normal text processing program (e.g. MS Word), and insert them into this dialog with copy Ctrl+C and paste Ctrl+V.
6. The "WYSIWYG" (What You See Is What You Get) button shows you the hyphenation based on the object size. This is just an approximate guide and can differ slightly.
7. Page breaks are created automatically if the available space is no longer sufficient and the "Page break" object property is set to "Yes". If you want to trigger a page break manually, you can do this by means of the context menu. Select the Pagebreak control character.
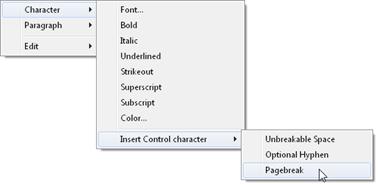
Figure 4.13: Context menu for a user defined page break