

combit List & Label
Defining Layers
You define layers via Project > Layer Definitions or by double clicking in the "Layers" tool window.
In the "Layers" dialog, you can define as many additional layers as you want with the "Insert line" button. Each new layer appears initially with the name "Layer". You can enter a meaningful name for the layer in the "Name" field.
§ When creating new projects, the "Base", "First page" and "Following pages" layers are automatically defined.
§ So that you can differentiate better between the different layers on the workspace, it's a good idea to give the layers different colors. This also causes the objects in the respective layers to be shown in different colors in the layout preview display mode. This color has no effect on the actual print.
§ If you delete a layer, the associated objects are automatically assigned to the base layer. At least one layer must be defined.
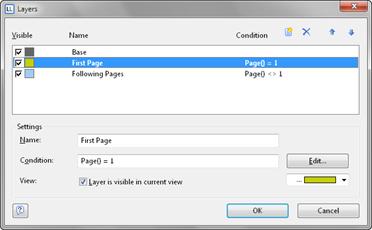
Figure 4.2: Layer definition dialog
In the "Condition" field you define the appearance condition for this layer. This appearance condition then applies for all objects on the layer in question, i.e. the associated objects are only printed when the condition for the layer is met.
Typical appearance conditions:
|
Condition |
Explanation |
|
no condition |
The objects on this layer are always printed. |
|
Page()=1 |
The objects on this layer are only printed on the first page. |
|
Page()<>1 |
The objects on this layer are printed from the second page onwards. |
Note: The Lastpage() function in an appearance condition can only be evaluated correctly if it is used within the footnote of a table object or in an object linked to a table. In the data lines, the result of Lastpage() is always "False".