In order to structure the invoice and make it more attractive, it's a good idea to give at least the column headers a colored background. You can also modify the background color.
1. To do this, select a column title.
2. Now open the paragraph properties dialog via the "Object properties" button in the mini toolbar. In this dialog, you can define the properties for each column and row. Hold down the Ctrl key and select all columns.
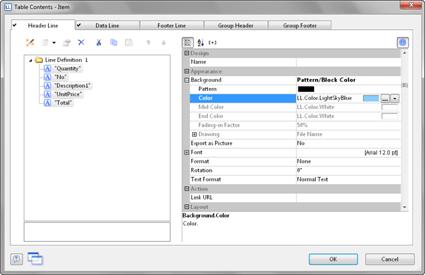
3. Click the "+" sign to expand the "Background" property group.
4. For the background, choose the "Pattern/block color" property and the color, e.g. LL.Color.LightSkyBlue. You reach the LL.Colors via the arrow button and the standard color dialog via the ... button.

Figure 2.52: Object properties dialog for the table: background
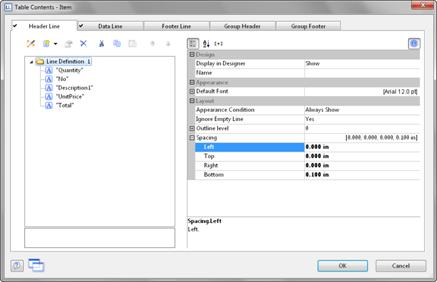
5. In addition, you want to increase the spacing between the header and the data line. Since this is a line property (and not a column property), select the line.
Here you have the "Spacing" property. Choose e.g. 0.1 inch as "Bottom" to increase the spacing below the column title.

Figure 2.53: Object properties dialog for the table: margins
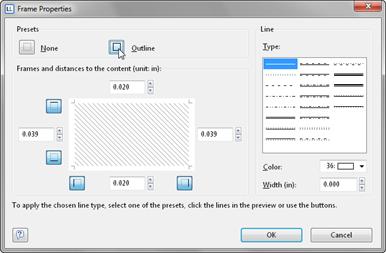
6. Now it only remains to make the settings for the frame. You can define different settings independently for each cell. However, it's normally a good idea to make the settings for the entire table. For this reason, the settings for the frame are included in the table properties. You will find the table properties, as standard, on the lower left when you select the table in the "Report Container" tool window. When you select the property, there is a button which you can use to open the dialog for the frame properties.

Figure 2.54: Frame properties
7. Choose "white" as the color and click "Outline" to apply the color.
Please note: If you don't apply the setting but simply confirm the dialog with OK, your settings will be lost!
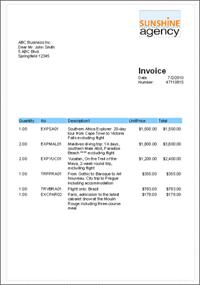
8. The invoice will now look roughly like this in the preview:

Figure 2.55: Preview (frame and background)

