

combit List & Label
Creating a Simple Label
For your first label, you will now create an item label.
1. Start the combit List & Label Sample Application
2. Choose Design > Item Labels to start the Designer.
3. A file selection dialog will appear. To start a new project, choose the New button.
Note: This button is not available in Windows XP. Enter a name for the new print template in the "File name" field and then choose "Open".
To open or edit an existing project, choose Open.
4. The standard project for this project type is displayed. This standard project is normally an empty workspace with a certain paper size and alignment.
5. Select a label format via Project > Page Setup. In the "Templates" tab, choose the template that you want from the predefined label formats of various manufacturers. This specifies automatically the size of the individual labels, how many are to appear on the sheet and how they are to be distributed. You will find more information about this in the chapter Templates for Label Formats.
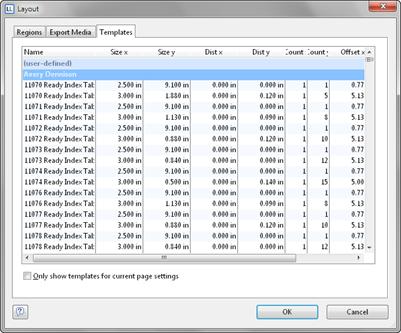
Figure 2.64: Specify label format
6. A single label will now be displayed in the workspace.
See also:
