You can also output a print in different file formats.
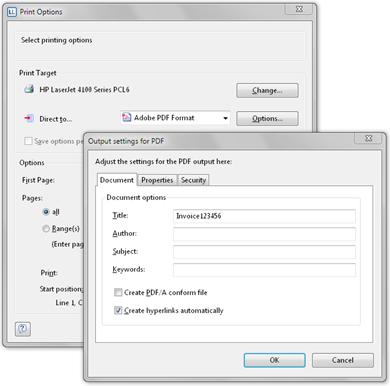
To do this, choose the relevant output medium in the Print Options > Print Setup dialog, which you reach via File > Export or via "Save as" from the preview.
Please consider that, due to the format, the layout cannot always be taken over 1:1 because there are specific restrictions when converting to these formats.
Many formats have various possibilities for configuration. You can make use of these by clicking the "Options" button.
§ For example, with Excel formats, you can reduce the number of columns and rows to the minimum required by means of the "Only data from table object(s)" option.
§ With PDF exports, you will find the option for creating a file that is PDF/A compliant. You will find more information about creating a PDF table of contents in Chapter Levels in the Table of Contents.

Figure 9.4: Output settings for PDF
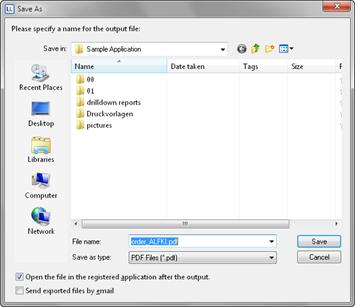
When you start the print, choose the storage location in the following "Save As" dialog and enter a name for the file to be created in the "File name" field.
§ By checking the option "Open the file in the registered application after the output", you can display the file after creation directly in the respective program (e.g. Excel).
§ The option "Send exported files by email" lets you send the files directly by email.
§ You can add a digital signature to your files by means of the "Digitally sign created files" option (not available in all applications).

Figure 9.5: Output options

