3 4 21 Network Client Server Details
From Installing LANSA on Windows
3.4.21 Network Client Server Details
The Network Client Server details dialog is automatically displayed if you have selected the Shortcuts to run Visual LANSA installed on another PC In this dialog, you enter the details of the Windows Server to which this Network Client is to be linked.
The Server can be either a Slave (connected to an IBM i) or an Independent system. In either case, the database on the server must be accessible by the Network Client Workstation.
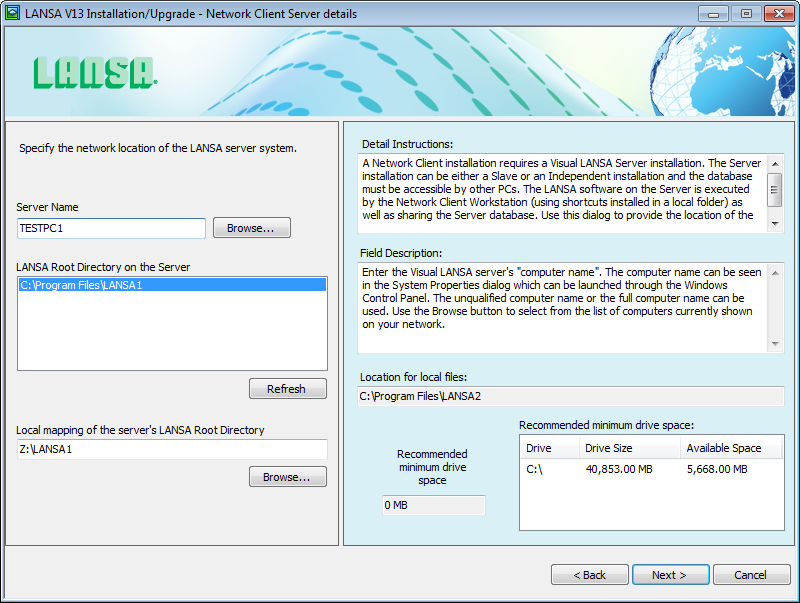
Server Name
The name of this PC on your server's network.
The unqualified computer name or the full computer name can be used. Use the button to select from the list of computers currently shown on your network.
LANSA Root Directory on the Server
Select the location of the configuration on the Server. Only configurations that match the version number of this install are listed.
Local mapping of the server's LANSA Root Directory
Map the directory of the Windows Server to this PC and specify the directory path here. If you have not already mapped this directory, stop and do it now. You don't have to restart the install process.
Note: UNC paths should not be used. If you have current Network Clients using UNC paths, the Visual LANSA automatic upgrade will allow you to continue to use these paths. However, it is strongly recommended that you install new Network Clients using a mapped drive.
Once the button is pressed, testing of the selected Server configuration is performed. These tests will confirm that the selected configuration is a valid Network Server for this install. For example, the Server's Visual LANSA must be at the same version as you are installing on the Client.
Location for local files
This is the directory into which this LANSA software is to be installed that was specified on the dialog. Press if you wish to change it.
Note: Your LANSA or Network Administrator must ensure that you have the required permissions to access the Windows Server. This includes read access to the registry and write access to the directory where Visual LANSA is installed.
You will now be asked for the 3.4.3 LANSA Network Name in the page. From there you can press the button.