3 4 Specify Options
From Installing LANSA on Windows
3.4 Specify Options
The dialog lists the options and settings that will be used to do the install based on the and that you have selected.
The options listed are essential to the correct operation of your LANSA system.
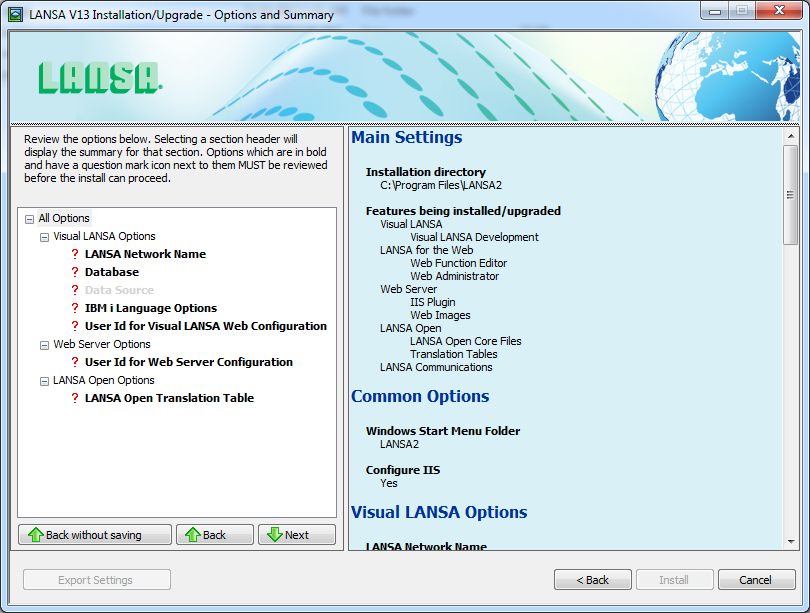
Options that are displayed in bold are known as mandatory options and must be reviewed before the Install can continue. These options are key to the correct operation of your LANSA system or are user specific (such as user ids and passwords). Options will be ticked ![]() when you have made your selection. A question mark
when you have made your selection. A question mark![]() indicates options that still require your attention. If you have elected to install a Typical Visual LANSA development environment, only mandatory options are displayed.
indicates options that still require your attention. If you have elected to install a Typical Visual LANSA development environment, only mandatory options are displayed.
Select a section heading (for example, Common Options) and a summary of all settings in all sub-sections will be displayed in the right hand pane. Select an option and the related settings will be displayed in the right hand pane. You can then modify the settings as required. The settings are verified and saved when either another option is selected, or a button is pressed.
The settings and options are described in the following topics. Depending on the products being installed, the options that could be required are:
|
3.4.1 Windows Start Menu Folder |
3.4.11 Listener Service Options |
3.4.14 Websites for IIS Plugin 3.4.17 JSM Administrator Service 3.4.19 User Id for JSMDirect Configuration |
If you select a sub-heading and valid data cannot be entered (due to a previous incorrect selection or for some other reason), you can exit from that option by pressing the button.
Export Settings
The button will save all settings and options to a Configuration File. The Configuration File can then be used for a 3.5 One-Click Install. When you save a Configuration File, the dialog will request a password. That same password will be required when using the Configuration File in a One-Click Install.
Back without saving
Settings are verified and saved when another option is selected. If an option has been selected but valid data cannot be entered (due to a previous incorrect selection or for some other reason), you can exit the option by pressing the button. All settings in the option will be reset to their value prior to the option being selected. The option's dialog will be closed and the ![]() question mark will be reinstated.
question mark will be reinstated.
Install
Press the button to start the file transfer and configuration part of the install. Make sure that your settings and options are correct before pressing .
Cancel
Press to cancel and exit this install process. None of the options or settings you have selected will be saved.