Perpendicular to the drawing
Select the option 'Vertically to drawing' when you want to measure a surface which is perpendicular to the level depicted in the drawing.
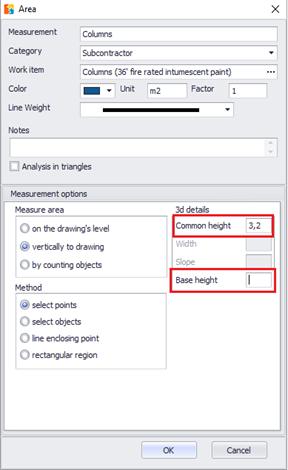
To measure surfaces that are perpendicular to the drawing, you are prompt to specify their height and their base height. If the surface height is uniform, enter its value in the ‘common height’ field, as illustrated, in the following window:
 The base
height does not affect the measurement result and it’s not necessary to be
defined. However it can help you to have a complete supervision of the drawing’s
measurements in 3D view. (See 3D View
  )
)
Click OK and mark the surface you wish to measure by drawing the outline of its base.
If the height is variable, leave the common height field blank and click OK. Every time you click on the nodes of the surface you measure, the following window appears:
Specify the height of this particular point in the surface you measure.
 This value will be the default
value for each subsequent node in the measurement, so as not to require from the
user to re-enter it –in case the additional height is equal to that of the
previous node- while users have the ability to change it.
 You can later change the height of a node,
even if you have opted for a common height; you will alter only the value of a
specific node. To do so, right click on any node of the measurement, choose
‘Figure data’ and edit the desired values in the table that is opened (See Measuring
in image files/Length measurement/Measuring procedure/Figure data).
 It is also
possible to input a height at an intermediate node of the line. To do so, right
click on the polyline and choose ‘Add node’, so that a new node is added (See Measuring
in image files/Length measurement/Measuring procedure/Add node). After moving the node to the desired location,
right click again and choose figure data, as described above.

