On the drawing’s level
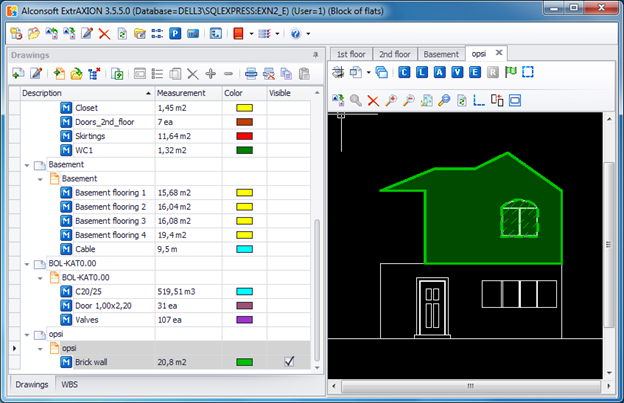
Select the option 'On the drawing’s level' when you want to measure a surface area which is located on the same level with the one depicted in the drawing. In order to measure the desired surface, you have to draw it again by consecutively clicking on its perimeter’s nodes.
During the measurement procedure, you can measure surface areas that are enclosed by curved lines by right-clicking and selecting ‘Drawing arc’ (See Measuring in image Files/Types & Methods of Measurement/Length Measurement/Measuring procedure).
If you want to calculate the total area of more than one surfaces in one measurement, press Esc once and then measure the next area, and so on (e.g. counting tiles in a WC and two bathrooms simultaneously).
The measuring procedure can be completed by right-clicking and selecting 'Terminate Measurement,' or by pressing the Εsc key twice.
To continue the measurement, click the  ‘Continue Measurement’ button
to add surface areas to the measurement, or
  ‘Continue Measurement (subtract)’ if you wish subtract the area of already drawn
surfaces (e.g. in the façade, by removing the surface area of the wall
openings). The surfaces that you remove from the measurement are marked on the
drawing with cross-hatching, while the outline of the areas removed is marked
with a dashed line.
 In the case of counting items, after
measurement completion, the Continue Measurement (subtract) option is disabled.
 If you wish to subtract items, you can
select them either one by one by clicking on them or all together, and then use
the ‘Delete selected’ option.
  .
.
 The different types of measurements
(on the drawing, perpendicular to the drawing, item counting) can be
interchanged and combined (e.g. on the drawing and perpendicular to the drawing
as in counting bathroom tiles), by using sub-measurements (See Drawings/Continue
measurement).
 The CAD vector files (.dwg, .dxf,
.dgn) provide additional abilities for measuring, in comparison to the image
files (See Measuring in vector files (CAD)).
 Alternatively, you can use F10 to toggle a
‘draw a curve’ mode.