Linear item
From ExtrAXION
Linear item
By selecting the option 'linear item', you can measure the volume from a linear item, as, for example, in the case you want to measure the volume of a trench in the perimeter of a plot, from a floor-plan view, in order to place rainwater drainage pipes.
To measure volume from a linear item, you will be prompted to fill in its width as well as its height in the corresponding fields; that is, if those characteristics are uniform throughout, as shown in the following window:
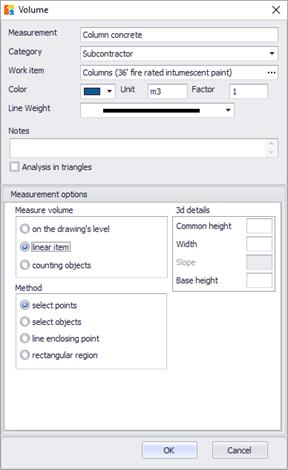
![]() The 'width' may only be uniform and
does not function the same way as the 'common height' field, which will be
considered variable if you do not fill in a value. If you do not specify a width
value, a warning message will appear.
The 'width' may only be uniform and
does not function the same way as the 'common height' field, which will be
considered variable if you do not fill in a value. If you do not specify a width
value, a warning message will appear.
Click OK and then click on the points of the linear item whose volume you wish to measure.
If the height of the linear items is variable, leave the corresponding field blank and click OK.
Every time you click on the points of the linear items whose volume you wish to measure, the following window appears:
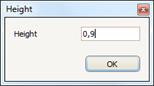
Specify the height of this particular point of the linear item you are measuring.
![]() This value will be the default
value for each subsequent object so the user does not have to re-enter it -in
case the surface area is equal to that of the previous object- while users have
the ability to change it.
This value will be the default
value for each subsequent object so the user does not have to re-enter it -in
case the surface area is equal to that of the previous object- while users have
the ability to change it.
![]() You can later change the height of a
point, even if you have opted for a common height; you will alter only the value
of a specific node. To do so, right click on any node of the measurement, choose
‘Figure data’ and edit the desired values in the table that is opened (See Measuring
in image files/Length measurement/Measuring procedure/Figure data).
You can later change the height of a
point, even if you have opted for a common height; you will alter only the value
of a specific node. To do so, right click on any node of the measurement, choose
‘Figure data’ and edit the desired values in the table that is opened (See Measuring
in image files/Length measurement/Measuring procedure/Figure data).
![]() It is also
possible to input a height at an intermediate node of the line. To do so, right
click on the polyline and choose ‘Add node’, so that a new node is added (See Measuring
in image files/Length measurement/Measuring procedure/Add node). After moving the node to the desired location,
right click again and choose figure data, as described above.
It is also
possible to input a height at an intermediate node of the line. To do so, right
click on the polyline and choose ‘Add node’, so that a new node is added (See Measuring
in image files/Length measurement/Measuring procedure/Add node). After moving the node to the desired location,
right click again and choose figure data, as described above.