Check In Options
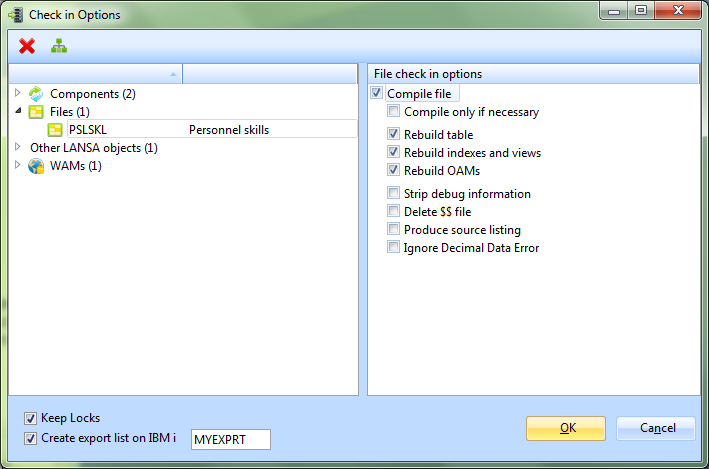
When an object is being checked in, you will be prompted for the actions to be performed when the check in is performed. For example, the following dialog will appear when checking in a File:

Keep Locks
This option, when checking objects in to the LANSA Master Repository on the IBM i, controls whether the objects remain locked to the PC and locked to the Task after check in is complete.
System Tasks (*N) are unaffected by this option. If there is a PC Lock it will remain and if there is a Task Lock it will remain. Use of System Tasks does not affect the current status of the PC Lock or Task Lock. System Tasks override the current lock status and allow the user to do anything whilst not affecting its lock status when used with other types of task.
For non-System Tasks, when unchecked (implies clearing the locks), on Windows, the objects are always unlocked from both the PC and the Task. Thus the objects will need to be checked out for update in order for them to be edited.
On IBM i, if the Task is a Normal Task the object is only unlocked from the PC. The Task Lock remains.
On IBM i, if the Task is *U or *T, and the system has been configured to allow locks to be released, then the objects are unlocked from both the PC and the Task.
Create Export List on IBM i
This option allows an export list containing the objects selected for check in to be automatically generated on IBM i during the check in processing. By default the export list will be created with the name CKInnnn where nnnn is the next available descending number based on existing export lists e.g. the first export list will be created as CKI9999, on the subsequent check in the next export list will be created as CKI9998.
To create an export list with a specific name or append to an existing export list, nominate the name in the space provided (do not use the prefix DLV or CKI).
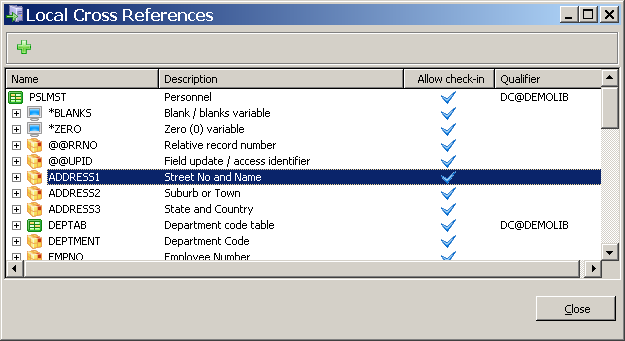
If you select an object (or more than one) and press this icon  , the Local Cross References dialog will open to show you all the objects used by the selected objects.

From the dialog you can select objects for inclusion in the check in by clicking on the  icon can add them to the Check In Options dialog to check them in as well.
Depending upon the type of object being checked in, you may wish to review the following in the