Step 3 Build Left Menu
From Web Functions Wizard
Step 3. Build Left Menu
WIZ004 - Defining a Standard Menu Component
In this step, you will create the left menu component. The menu will include two dynamic buttons to link to another LANSA process and function.
1. Select the Left Menu Tab. Check your current process is set as iiPROC01, where ii are your initials.
2. Press the Add Menu Item button. Notice the left menu is selected by default.
3. When the Define Left Menu detail panel appears enter this information:
|
Sequence Number |
10 |
|
Menu Type |
|
|
Description |
Display Sections |
|
Button Style |
Button Curved / Light Orange |
|
Menu State |
|
|
Link Type |
|
|
Process |
iiPROC01 |
|
Function |
iiFN001 |
|
Reuse Job |
check box (i.e., yes) |
|
Start in New Window |
uncheck box (i.e., no) |
Notice your button style and color are pre-selected based on the values you set up using Menu Features in Step 2.
4. Press .
5. When the Define Left Menu panel appears, press the button again. Enter this information:
|
Sequence Number |
20 |
|
Menu Type |
|
|
Description |
Display Personnel Skills |
|
Button Style |
Button Curved / Light Orange |
|
Menu State |
|
|
Link Type |
|
|
Process |
IiPROC02 |
|
Function |
iiFN002 |
|
Reuse Job |
check box (i.e. yes) |
|
Start in New Window |
Uncheck box (i.e. no) |
6. Press .
7. When the Define Left Menu panel appears, press the button. (Do not check the box to Include Menu Separator Between Menu Items.)
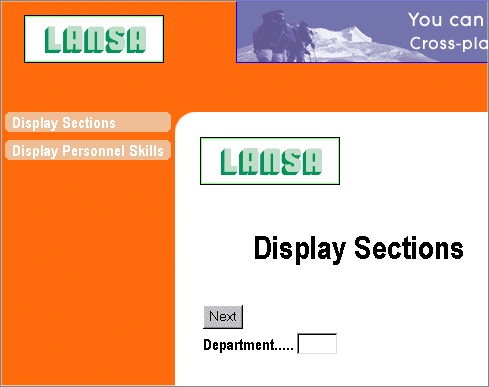
8. Using a second browser, execute your test function iiFN001. You should see two buttons in your left menu. Notice that when you select Display Personnel Skills, function iiFN002 has not been customized with the Wizard.
9. In the final application, you will want to have the same presentation layout for all functions so that you can navigate between all functions using the menus. In order to accomplish this goal, complete WIZ007 - Adopting a Presentation Layout.