Step 4 Modify Browse List Presentation Attributes
From Web Functions Wizard
Step 4. Modify Browse List Presentation Attributes
WIZ002 - Customizing Browse List Variables
In this step, you will continue to customize the presentation of the browse list, using the Wizard, by altering the presentation attributes.
1. Execute the Web Functions Wizard again to set the browse list variables for iiLIST2 (where ii are your initials).
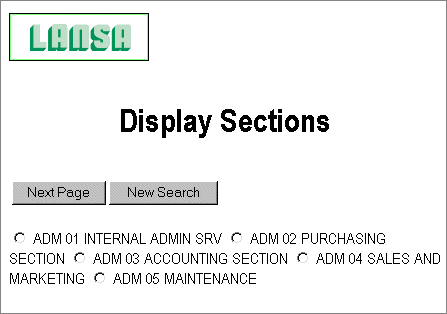
2. Change the Presentation Attributes so that Column Headings and Table Tags are not used, i.e. check the boxes.
3. Press Apply to update the variables.
4. Using your first browser window, execute your test function to review the changes. You should see the data displayed without column headings. Also, your color settings are not applied as the data is not in an HTML table. Your list will appear similar to this:
5. Using your Wizard browser Window, execute the Web Functions Wizard again to set the browse list variables for iiLIST2.
6. Reset the Presentation Attributes so that Column Headings and Table Tags are used, i.e. uncheck the boxes.
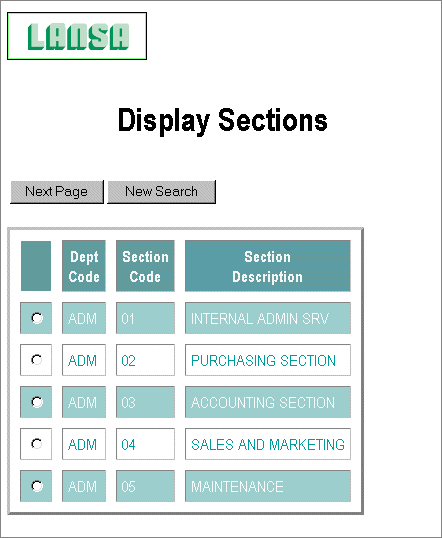
7. For the Selection image for the browse list, enter wiztick.gif.
8. If you are using an Internet Explorer browser, try using the Image button to preview the image.
9. Set the HTML Attributes used in conjunction with the <table> tag as follows border="3 " cellpadding="5" cellspacing="10". Be sure to enter this text using upper case characters.
10.Press Apply to update the variables.
11.Execute your test function to review the changes. Remember, you have created a *WEBEVENT function so the browse list image is not used. Your list appears something like this: