| Triggering |


|
For oscilloscope and spectrum analyser windows, it is possible to specify a trigger event for collecting the block of data. The block of data can be collected immediately after the trigger event, or it can be a specified delay (expressed as a percentage of the scan time) after the trigger event. A negative trigger delay means that part or all of the data block is before the trigger event.
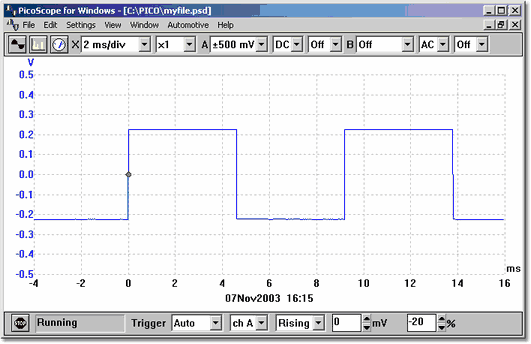
The trigger event occurs when the signal level for the specified channel crosses a threshold. It is possible to select whether the event is a rising or a falling as it crosses the threshold. The following diagram shows a rising trigger event, with a delay of -20%.
If the trigger event occurs only once, it is useful to be able to stop immediately after collecting the data for the trigger event. You can do this by checking the Stop after trigger option in the Trigger dialog box, or by setting the trigger mode to Single in the Sampler and trigger toolbar.
Note: If you turn off auto-trigger when using a product other than an oscilloscope from the ADC-200 and PicoScope 2000 and 3000 series, PicoScope locks the computer until a trigger event occurs. If PicoScope does become stuck, click on the Stop button in the Sampler / trigger toolbar, then press F9 (16-bit applications) or F10 (32-bit applications) to cancel the trigger.
If a particular event only occurs very occasionally, it is useful to leave PicoScope running with the Save on trigger option set. Each time a trigger event occurs, the data is written to a sequence-numbered file. You can later examine the data using the page up and page down keys to take you through the sequence of recorded events.
The same trigger settings apply to all instrument windows.