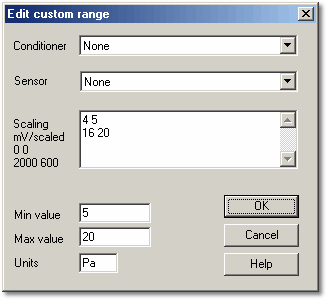
| Edit custom range |


|
From the Custom range list dialog box, select a custom range, then click on Edit.

You use this dialog box to add or edit a new custom range. Note: When you use DrDAQ, there is a different dialog box.
For your information, the signal conditioner information is derived from the Signal conditioner files. You can create a user PSC file for sensors that you wish to use regularly. See the signal conditioner help for more information about these files or any other aspect of signal conditioners.
Using a signal conditioner:
|
|
2 Select a sensor, the computer fills in the minimum and maximum value and the units for this sensor
3 You can, if required, alter the minimum and maximum values if you are using only part of the range. For example, Pt100 goes from -200°C to 370°C). But you may wish to display 0 to 100°C. You can even create two Pt100 custom ranges- one for 0 to 100 and another for 0 to 200, if required
Using your own sensor:
1 Leave the conditioner and sensor set to None
2 Type in pairs of raw and scaled values in the edit box. For example, if you are using a pressure sensor that produces 0 mV at 0 bar and 2000 mV at 100 bar, type in:
| 0 0
|
| 2000 100
|
4 Type in the units (bars in this case)
 Related Topics