The Pool frames
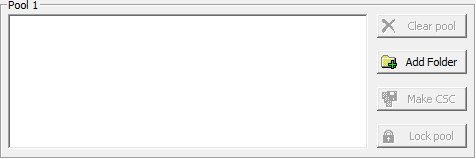
The Main window offers two pool frames: Pool 1 and Pool 2. Here, you specify the drives and folders to be recursively searched for files that are, for example, identical or have the same name. See the Search for frame for corresponding settings.
For an explanation of why there are two pools, please have a look at the Mode frame.
The button Clear list removes all drives and folders from the list box. In order to remove single entries from a pool you can use the Del key on your keyboard.
When you select Add folder the Add folder window appears in order to let you add drives and folders to the list box. Another way to add folders to the pool is to "drag" them from the Windows Explorer and "drop" them directly on the pool. However, if you run CloneSpy with elevated permissions, then you also have to run the Windows Explorer with administrator rights.
A right click on the pool shows a popup menu of recent pool files that were either saved, loaded, or merged in the Add folder window. Selecting one of these files will replace the pool's current content by that of the corresponding pool file. If you right click on an entry in the list box, then the popup menu will additionally contain the option Explore Folder for exploring the corresponding drive or folder with the Windows Explorer.
You have the option of either scanning the specified drives and folders right away by starting the scanning process, or creating a CloneSpy checksum file. If you select Make CSC, a dialog box opens and you can specify the file name for the output checksum file. This checksum file will contain all necessary data for the files found in the corresponding pool (including a specific 256 bit checksum), having regard to all restrictions entered in the Options window. Checksum files allow you to compare them to other files on your hard drive at a later point in time. This is quite useful if you want to compare files on your hard drive to files you have stored on a backup CD. This way you do not need to keep scanning your backup CDs again and again - you just store the corresponding checksum files once on your hard drive. The size of a checksum file depends on the number of files you load in the pool. Of course, if you let CloneSpy compare a checksum file to files on your hard drive, you will only be able to delete files on your hard drive.
The Lock pool button is disabled at the beginning. After scanning a pool for the first time, the background color of the pool will change from the default color (normally white) to light green. In addition, the Lock pool button is enabled. This shows that checksums generated in the scan just completed may be used again for the next scan. This may result in faster processing. In order to reuse the data stored in a pool, press the Lock pool button. The appearance of the button will change from

to

and the background color of the pool will change from light green to light red. The corresponding pool will not be acquired again, but it may be necessary for additional checksums to be generated. Press the button a second time to unlock the pool again.
Assume, that a pool is lockable (i.e. the Lock pool button is enabled). If you now change some settings in the Options window, the color of the pool items will change back from light green to the default color (normally white), because different restrictions may result in the acquisition of different files. But, if you lock the pool before changing the options, the changes do not affect the content of the pool. For example, you may lock Pool 1 after scanning it, change the options in order to acquire files in Pool 2 with different settings, and scan it against Pool 1.
Caution!
Be careful what you enter in the pools. Add only drives and folders which contain data which you understand and would be happy to delete. Because all folders are scanned recursively, it is most important that you do not enter the entire drive where your Windows system is installed.
The Main window offers two pool frames: Pool 1 and Pool 2. Here, you specify the drives and folders to be recursively searched for files that are, for example, identical or have the same name. See the Search for frame for corresponding settings.
For an explanation of why there are two pools, please have a look at the Mode frame.
The button Clear list removes all drives and folders from the list box. In order to remove single entries from a pool you can use the Del key on your keyboard.
When you select Add folder the Add folder window appears in order to let you add drives and folders to the list box. Another way to add folders to the pool is to "drag" them from the Windows Explorer and "drop" them directly on the pool. However, if you run CloneSpy with elevated permissions, then you also have to run the Windows Explorer with administrator rights.
A right click on the pool shows a popup menu of recent pool files that were either saved, loaded, or merged in the Add folder window. Selecting one of these files will replace the pool's current content by that of the corresponding pool file. If you right click on an entry in the list box, then the popup menu will additionally contain the option Explore Folder for exploring the corresponding drive or folder with the Windows Explorer.
You have the option of either scanning the specified drives and folders right away by starting the scanning process, or creating a CloneSpy checksum file. If you select Make CSC, a dialog box opens and you can specify the file name for the output checksum file. This checksum file will contain all necessary data for the files found in the corresponding pool (including a specific 256 bit checksum), having regard to all restrictions entered in the Options window. Checksum files allow you to compare them to other files on your hard drive at a later point in time. This is quite useful if you want to compare files on your hard drive to files you have stored on a backup CD. This way you do not need to keep scanning your backup CDs again and again - you just store the corresponding checksum files once on your hard drive. The size of a checksum file depends on the number of files you load in the pool. Of course, if you let CloneSpy compare a checksum file to files on your hard drive, you will only be able to delete files on your hard drive.
The Lock pool button is disabled at the beginning. After scanning a pool for the first time, the background color of the pool will change from the default color (normally white) to light green. In addition, the Lock pool button is enabled. This shows that checksums generated in the scan just completed may be used again for the next scan. This may result in faster processing. In order to reuse the data stored in a pool, press the Lock pool button. The appearance of the button will change from
to
and the background color of the pool will change from light green to light red. The corresponding pool will not be acquired again, but it may be necessary for additional checksums to be generated. Press the button a second time to unlock the pool again.
Assume, that a pool is lockable (i.e. the Lock pool button is enabled). If you now change some settings in the Options window, the color of the pool items will change back from light green to the default color (normally white), because different restrictions may result in the acquisition of different files. But, if you lock the pool before changing the options, the changes do not affect the content of the pool. For example, you may lock Pool 1 after scanning it, change the options in order to acquire files in Pool 2 with different settings, and scan it against Pool 1.
Caution!
Be careful what you enter in the pools. Add only drives and folders which contain data which you understand and would be happy to delete. Because all folders are scanned recursively, it is most important that you do not enter the entire drive where your Windows system is installed.