


In this exercise, you’ll export the drawing layers from the original DWG file to a new SDF file. The original drawing layers become geospatial features with properties that reflect the object data and AutoCAD properties.
The Export dialog box has a mapping option that lets you assign each layer to a target feature class and convert object data and properties to geospatial attribute data. Once you set up the mapping, you can save your settings as a profile, allowing you to use the settings over and over again.
You cannot maintain styling information when you export drawing objects to SDF, but you can include object attributes. When you export the Waterline layer, you will map the Color attribute to a SIZE property.
The Export dialog box has three tabs. The following exercises describe the steps to take on each tab.
To select the layers to export to SDF
- Click File menu
 Convert
DWG To Autodesk SDF.
Convert
DWG To Autodesk SDF.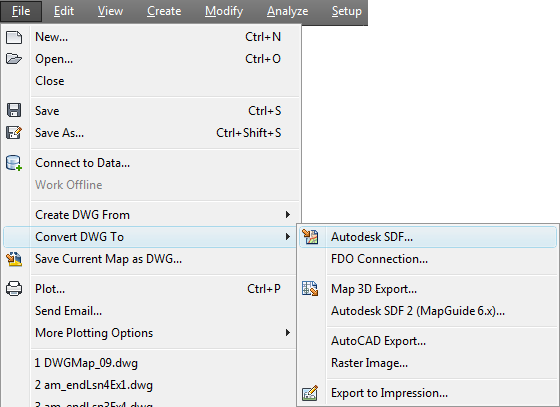
- In
the Save dialog box, specify a location and a name for the new SDF
file and click OK.
Make a note of the file name and location, so you can connect to this file later.
- In the Export dialog box, on the Selection tab, click Select All.
To continue this tutorial, go to Exercise 4: Export the drawing layers to SDF - Map object data to feature class properties.