Lesson 5: Publishing Your Styled Map to MapGuide

Lesson 5: Publishing Your Styled Map to MapGuide

Glossary

AutoCAD Map 3D Tutorials > Styling, Splitting, and Using Joined Data with
Polygon Features > Lesson 5: Publishing Your Styled Map to MapGuide >
Exercise 1: Publish to MapGuide
When you publish to Autodesk MapGuide, you create a web page containing a picture of your map. You will need rights to a MapGuide 2009 Server, which supports the new templates used in this exerciese. You must have credentials and write rights in order to do this exercise.
NoteThis exercise uses the
map you created and modified in the previous exercises.
- Save the map.
- Click File menu
 More Plotting
Options Publish to Autodesk MapGuide.
More Plotting
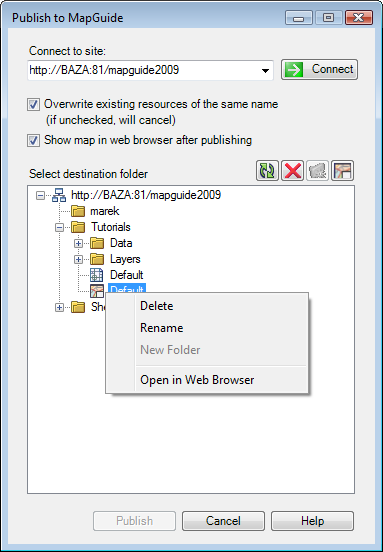
Options Publish to Autodesk MapGuide. - In
the Publish To MapGuide dialog box,
specify the URL for the target website.
If the site requires a password, a Connect to Site dialog box is displayed. Enter your user name and password.
- Select
a folder for the published files.
To create a new folder, right-click the parent folder and click New Folder.
- Check both options (for overwriting existing resources and previewing the results).
- Click Publish.
Once the publish operation is complete, the results appear in a browser window.
- To
view the published map again later, click File menu More
Plotting Options Publish to Autodesk MapGuide and
connect to the website. Then right-click the map to view and click Open
In Web Browser.
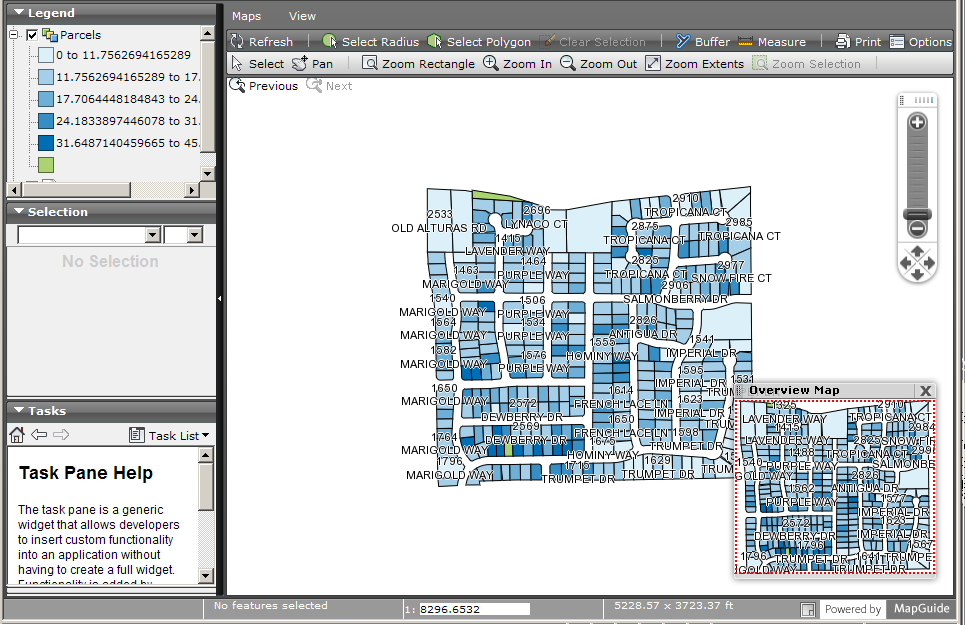
NoteYou can use tooltips to
display information when the viewer holds the cursor over a particular
area. Within Autodesk MapGuide Studio, you can create tooltips that
display attribute values on the MapGuide web page when the viewer
hovers over a parcel. For more information, see the Autodesk MapGuide
Help.