Lesson 3: Moving SDF Data to a Different Geospatial Format

Lesson 3: Moving SDF Data to a Different Geospatial Format

Exercise 2: Use Bulk Copy to move an SDF layer to SHP format

AutoCAD Map 3D Tutorials > Tutorial: Managing Data From Different Sources > Lesson 3: Moving SDF Data to a Different Geospatial
Format >
Exercise 1: Connect to a new SHP file folder
Create a new, empty folder to contain the SHP files. In order to convert and copy data to the SHP format, you must be connected to this folder. You use Data Connect to establish connections to data stores, even when you don’t add anything to the map from the data store.
NoteThis exercise uses the
map you opened in the first lesson, with the modifications you made
in the previous exercises.
To create and connect to the folder
- Use Windows Explorer to navigate to the location where you copied your sample tutorial files.
- Create a folder for the SHP files.
- In AutoCAD Map 3D, switch the Task Pane to Display Manager.
- Click Data
 Connect
To Data.
Connect
To Data. - On the left side of the Data Connect dialog box, click Add SHP Connection.
- On
the right side of the Data Connect dialog
box, click the folder icon (not the file icon). Select the folder
you just created and click OK.Click Connect and close the Data Connect window without adding anything to your map.
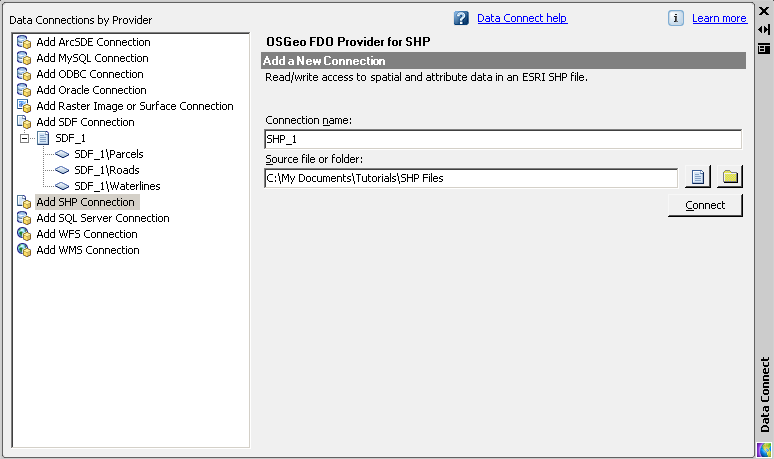
Click the folder icon next to Source File Or Folder.
To continue this tutorial, go to Exercise 2: Use Bulk Copy to move an SDF layer to SHP format.