Lesson 4: Create Map Features

Lesson 4: Create Map Features

Exercise 2: Add information about the new parcel

Exercise 1: Draw a new parcel
When you draw a new feature, it is automatically added to the layer from which it was created. The source for that layer is updated to include the feature you added.
NoteThis exercise uses the BuildMap1.dwg map you created and
modified in the previous exercises.
- If
it is not still open, open your map from the previous lesson.
- Click File menu
 Open.
Open. - Locate the BuildMap1.dwg file.
- Select it, and click Open.
- Click File menu
- In the Task Pane, switch to Display Manager .
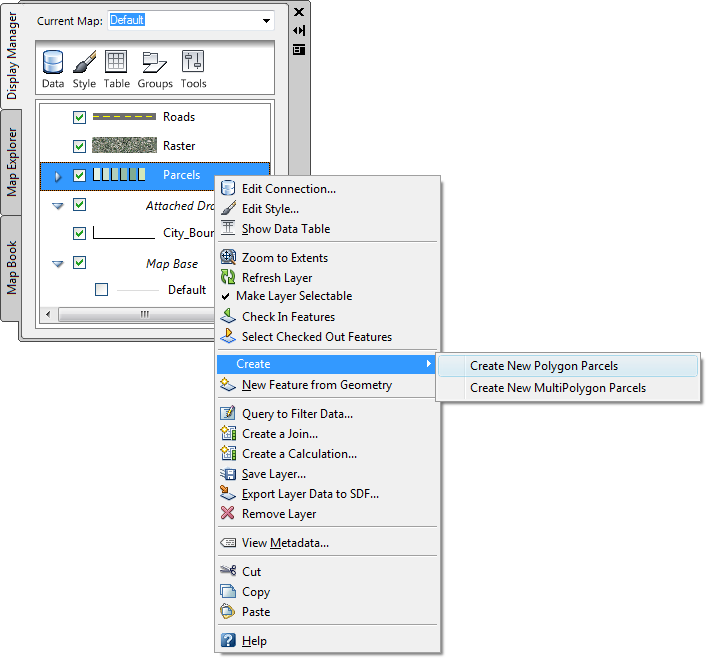
- Right-click the Parcels layer.
- Click Zoom to Extents.
- Right-click
the Parcels layer again and click Create Create
New Polygon Parcels.
Create a new feature on an existing layer.
- Click a starting point in the map for the new parcel.
- Click three more points to define the beginning of the parcel and its first three sides.
- Press the down arrow on your keyboard to see a menu of choices in the dynamic input line.
- Press
the down arrow again until a dot is displayed next to Close,
showing that it is selected.

Use dynamic input to draw the parcel.
- Press Enter to close the polygon.
- Select Exit from
the dynamic input menu to complete the command.
The parcel is complete and the Data Table is displayed.
NoteIf the Data Table is docked, move your cursor over it to display it. If the Data Table does not display automatically, select the Parcels layer in Display Manager and click Table.
To continue this tutorial, go to Exercise 2: Add information about the new parcel.